How to Create an Online Store With WordPress in 7 Steps Using WooCommerce
As eCommerce platforms become more accessible, aspiring sellers get multiple options to start selling online or expand their offline store’s reach.
One popular option is using WordPress and one of its most popular eCommerce plugins, WooCommerce. The platform and plugin’s user-friendly interface, extensive customization options, and scalability empower users of all skill levels to make their eCommerce stores.
This WordPress tutorial will show you how to create an online store with WooCommerce. We’ll also go through the benefits of starting your online business venture on WordPress.

How to Start a WordPress Online Store in 7 Steps
WordPress has a wide range of plugins to scale your eCommerce site. In this tutorial, we’ll use WooCommerce, one of the best free plugins for creating online stores.
Getting Started With WooCommerce
Check out our WooCommerce tutorial to unlock the plugin’s full potential.
Here are the seven essential steps to creating an eCommerce website with WordPress.
1. Decide What You Want to Sell
Your product choices will shape the entire eCommerce business, from marketing strategy to store design. Basing this decision on your expertise and passion will make your business journey more enjoyable, boosting your investment in the growth and quality of your offerings.
Use product research tools like Google Trends and Trend Hunter to find profitable products to sell. For more inspiration, see our list of trending products and profitable things to make and sell for inspiration.
Whether selling physical or digital products, WordPress and WooCommerce can support your business needs. The CMS’s scalability and the plugin’s eCommerce functionality can handle different types of businesses, from boutiques to eBook marketplaces.
2. Choose the Right WooCommerce Hosting Platform
Since WordPress is self-hosted, you need to buy web hosting and a domain name to run it. Many hosting options are available with various features at different prices, so pick one that best suits your needs.
With Hostinger’s managed WooCommerce hosting, you can save time by configuring WordPress installation and WooCommerce store setup during the onboarding process. Starting at ₱499.00/month, our hosting service provides a free domain name, SSL certificate, email, and automatic daily backups.
We also provide a free in-house content delivery network (CDN) for optimized performance, ensuring your eCommerce store works optimally even during peak traffic.
3. Configure WooCommerce Settings
Once you have installed WordPress, follow these steps to set up your WooCommerce website:
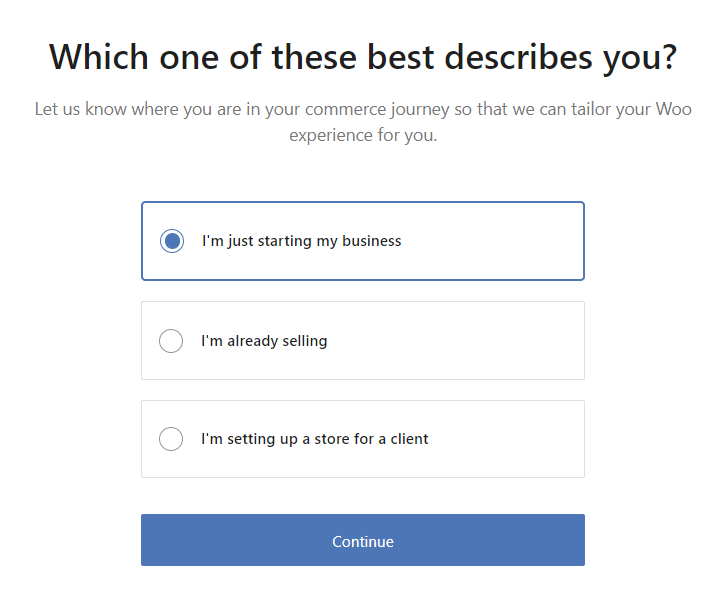
- Install and activate the plugin to access the WooCommerce Setup Wizard. Click Set up my store to start the setup process.
- Choose the seller profile that best describes your business venture.
- Fill in your online store’s name, location, product type, and email address.
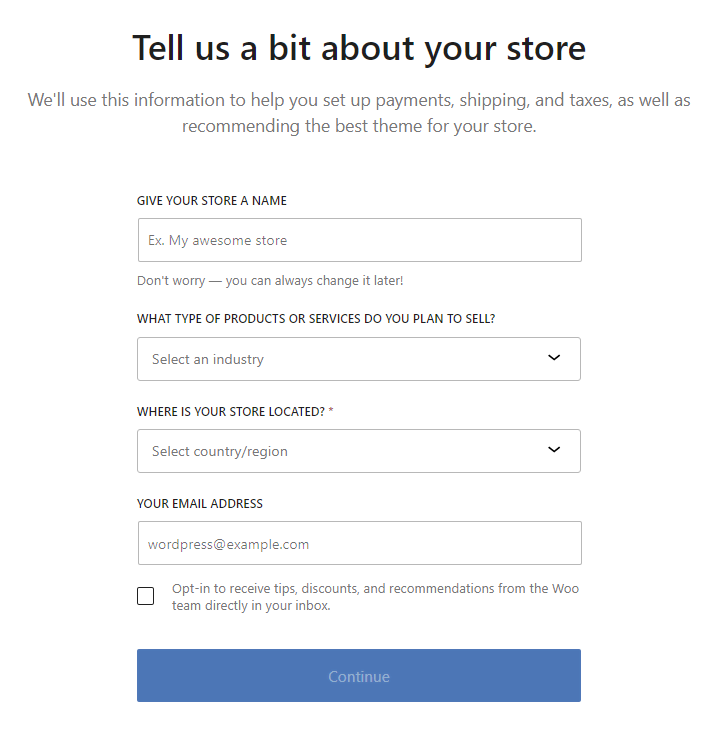
- WooCommerce offers free features to scale your WordPress eCommerce store. For now, click Continue to skip ahead.

- After the initial setup is complete, it will redirect you to the WooCommerce dashboard.
4. Customize Your Store with an eCommerce Theme
The store’s design influences your brand’s look and feel, impacting the shopping experience. Fortunately, WooCommerce has a wide range of excellent eCommerce themes for various business niches.
When choosing a theme for your eCommerce platform, prioritize a design that aligns with your brand and effectively displays your products. A good theme should be visually appealing, easy to navigate, and well-organized.
Follow these steps to change your online store’s design:
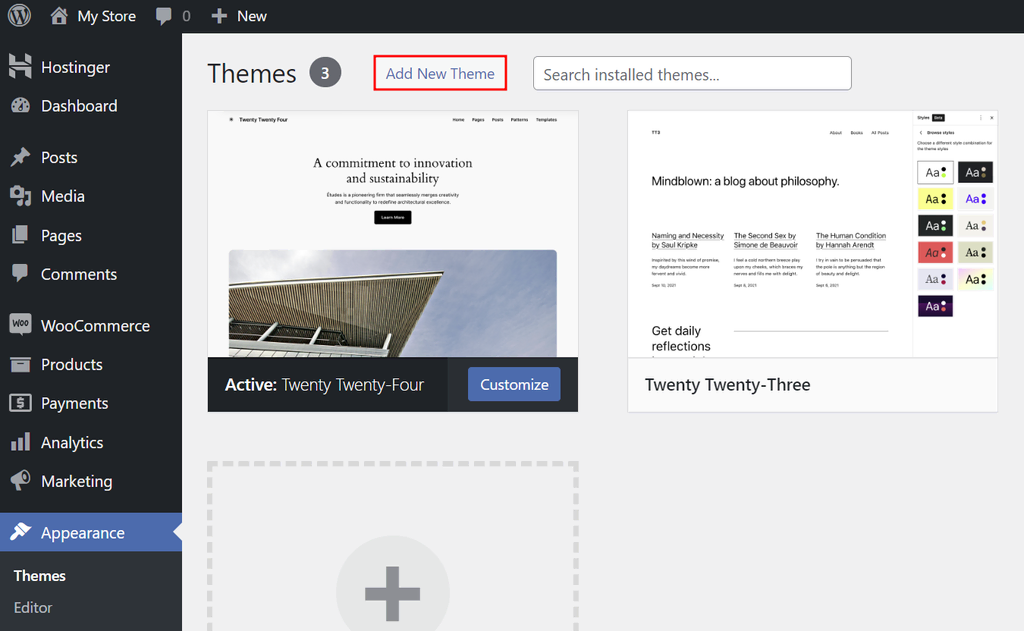
- Navigate to Appearance → Themes from your WordPress dashboard and select Add New Theme.
- Click Feature Filter and select eCommerce under Subject to show only eCommerce themes in the search results. Hit Apply Filters to confirm your choice.
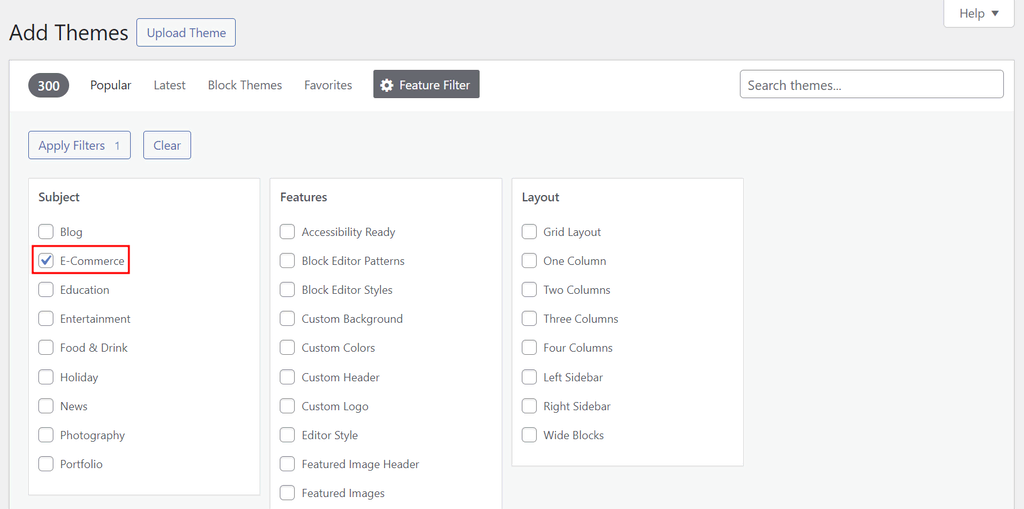
- Install and activate the WordPress theme that best suits your online store.
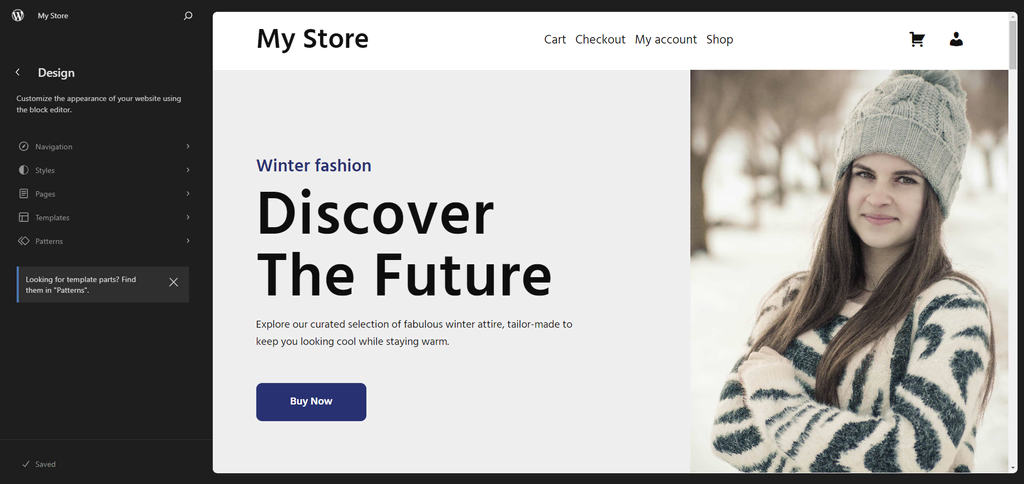
- Click on the Customize button above your chosen theme. It will redirect you to WordPress Theme Editor, where you can modify the site’s appearance.
Check out some of the best WooCommerce themes to help you start:
- Astra ‒ a premium, lightweight theme with abundant customization options.
- OceanWP ‒ one of the fastest WordPress themes suitable for various business niches.
- Zigcy Lite ‒ a free, SEO-ready WordPress theme with deep-level WooCommerce integration.
- WooCommerce Storefront ‒ a free WooCommerce-developed theme with a range of extensions.
5. Set Up Payment Methods
Your chosen payment gateway directly impacts how you accept payments from customers. The right payment gateways ensure smooth and secure checkouts, so it’s crucial to set them up correctly.
WooPayments accepts debit and credit card payments and local payment methods. It’s one of the best WooCommerce payment gateways available, offering seamless integrations and ease of use.
WooCommerce also supports third-party payment options like Stripe, PayPal, and Apple Pay. Install and connect your chosen payment gateway’s extension to your online store or purchase its plugin from WooCommerce Marketplace.
Here’s how to configure WooPayments on your eCommerce website:
- Go to WooCommerce → Settings from the WordPress dashboard.
- Open the Payments tab to see the available payment methods.
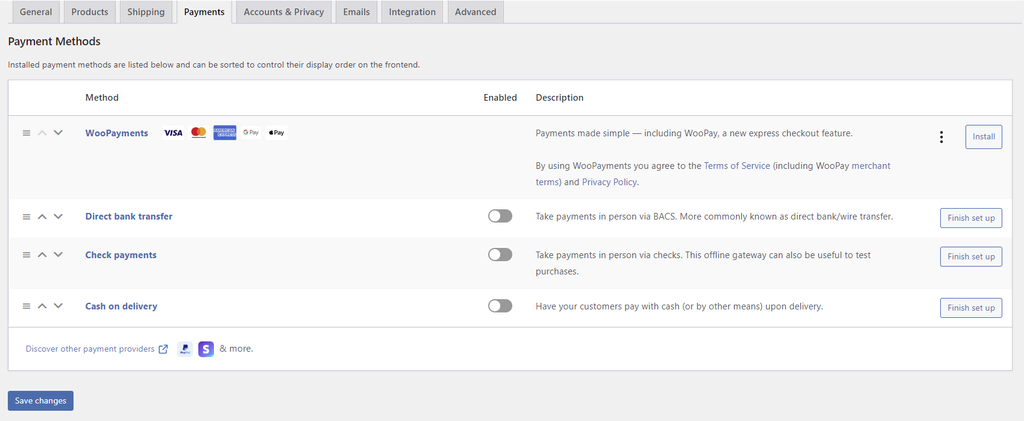
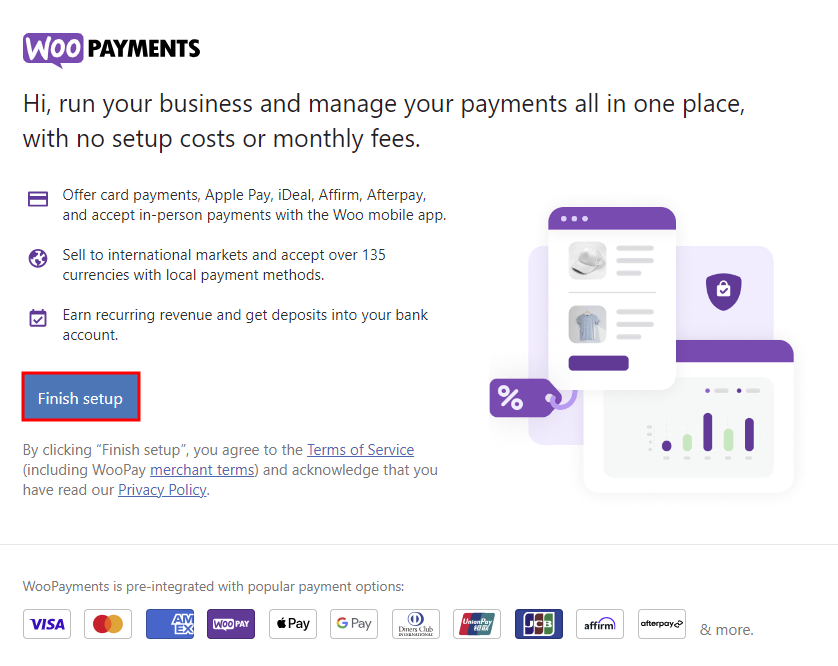
- Click Install to activate WooPayments. Once it redirects you to Payments, select Finish setup.
- Enter your email address to verify the connection.
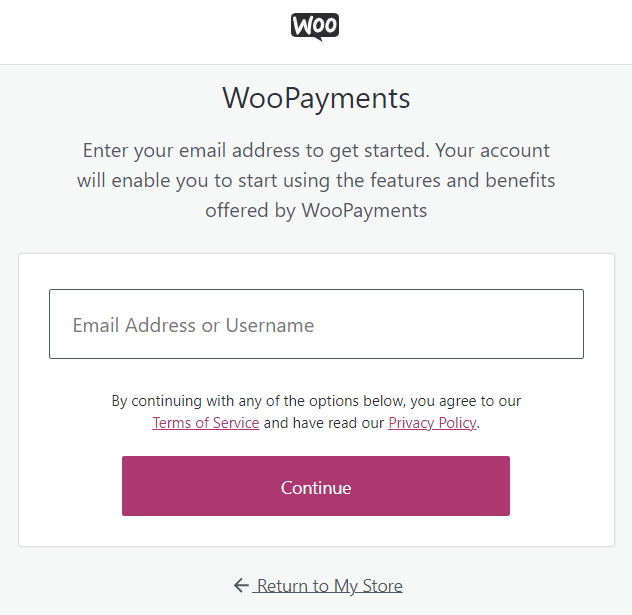
- WooCommerce will email a link to connect your online store with WooPayments. Click on it to continue the setup process.
- Enter your personal information to sign up for a WooPayments account.
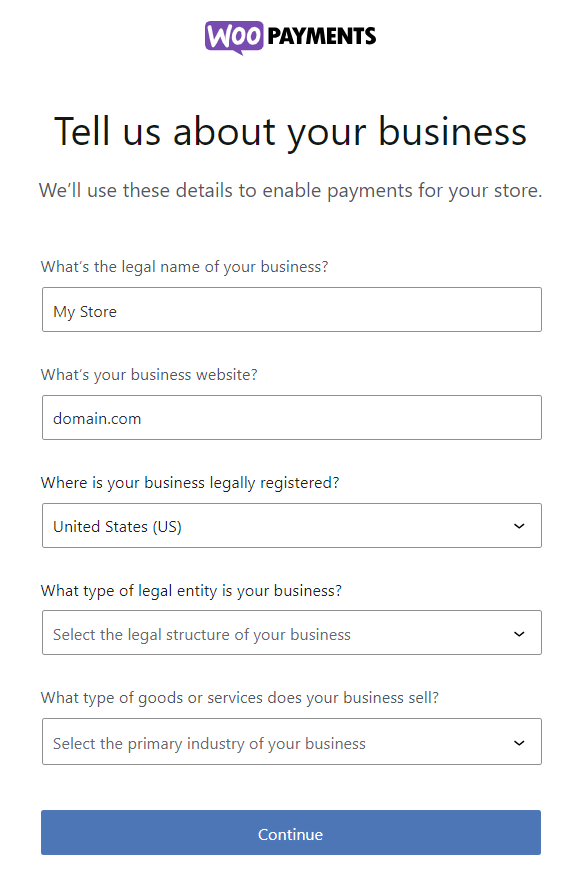
- Enter your business details, including your store’s legal name and URL.
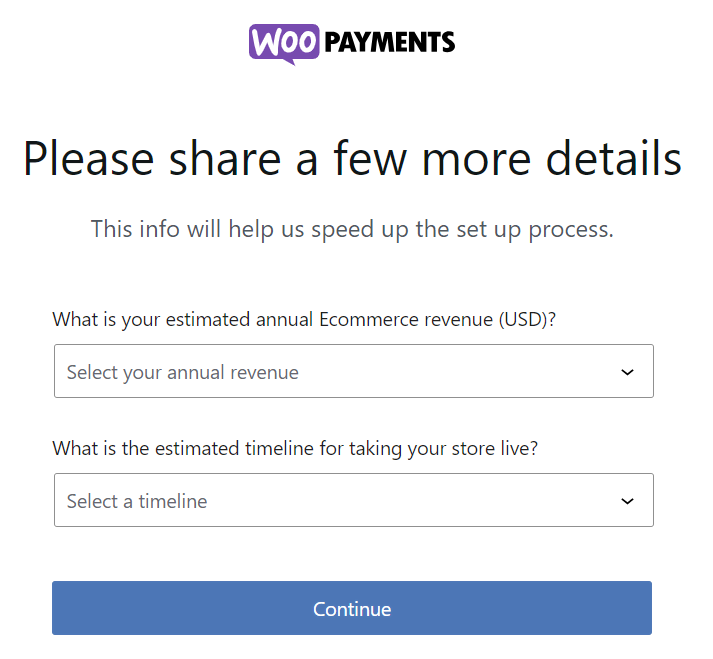
- State your estimated annual revenue and the timeline to launch your business.
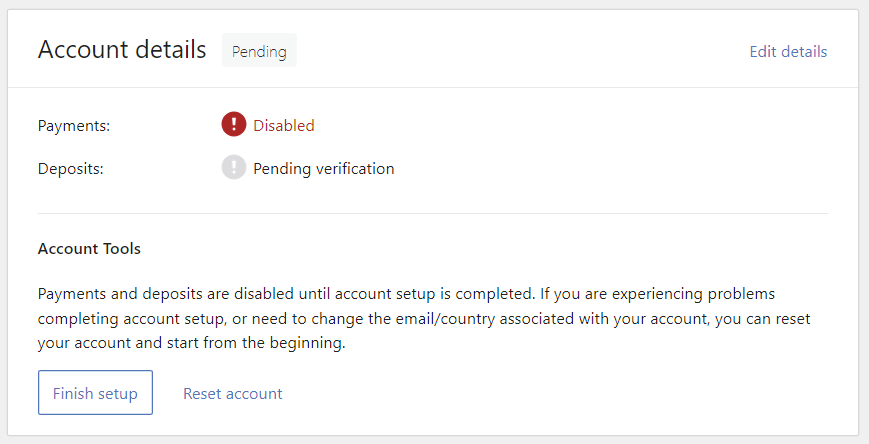
- Follow the rest of the setup wizard to connect WooPayments with your bank account or debit card. Your online store is ready to accept payments once the Payments status turns to Enabled.
6. Add Products to Your WooCommerce Store
After setting up your WordPress eCommerce website, it’s time to populate it with products.
Here’s how to do it:
- Go to Products → Add New from the WordPress dashboard.
- Enter the product’s name and description. See our guide on writing a product description for tips.

- Pick a product type from the dropdown menu within the Product data section.
- Simple product ‒ covers items sold individually, like a lamp. Check the Virtual option if it’s intangible or Downloadable to grant file access upon purchase.
- Grouped product ‒ collections of related products that customers can buy individually, like a set of tea cups and saucers.
- External or affiliate product ‒ items sold on a third-party platform, but promoted on your WordPress website.
- Variable product ‒ products with variations, like a shirt in different colors and sizes.

- Fill in the required information based on the product type, such as the prices, stock status, and attributes.
- Add the product category and tags on the right menu.
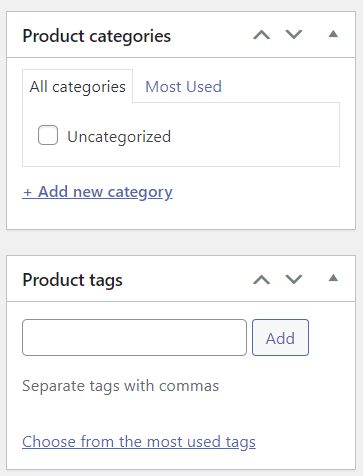
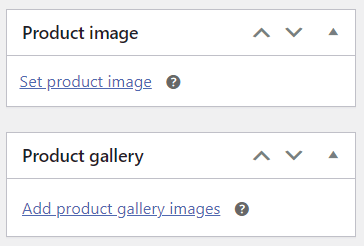
- Upload your product’s featured image via Product image and supplementary images in Product gallery.
- Make the product listing private or password-protected if you’re not ready to make it public yet. Alternatively, schedule a publish date to make it visible to the public at a later time.
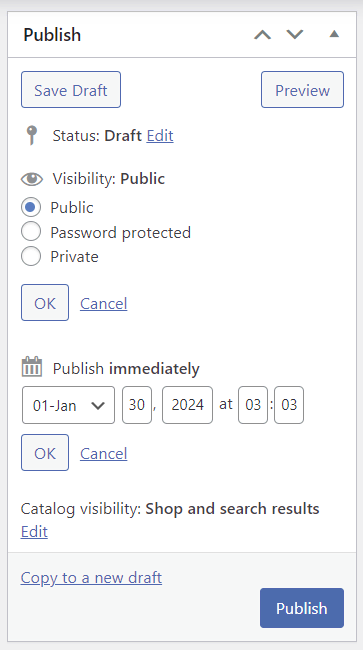
- Click on the Preview button within the Publish section to see how the product page looks. Once you’re happy with the result, hit Publish.
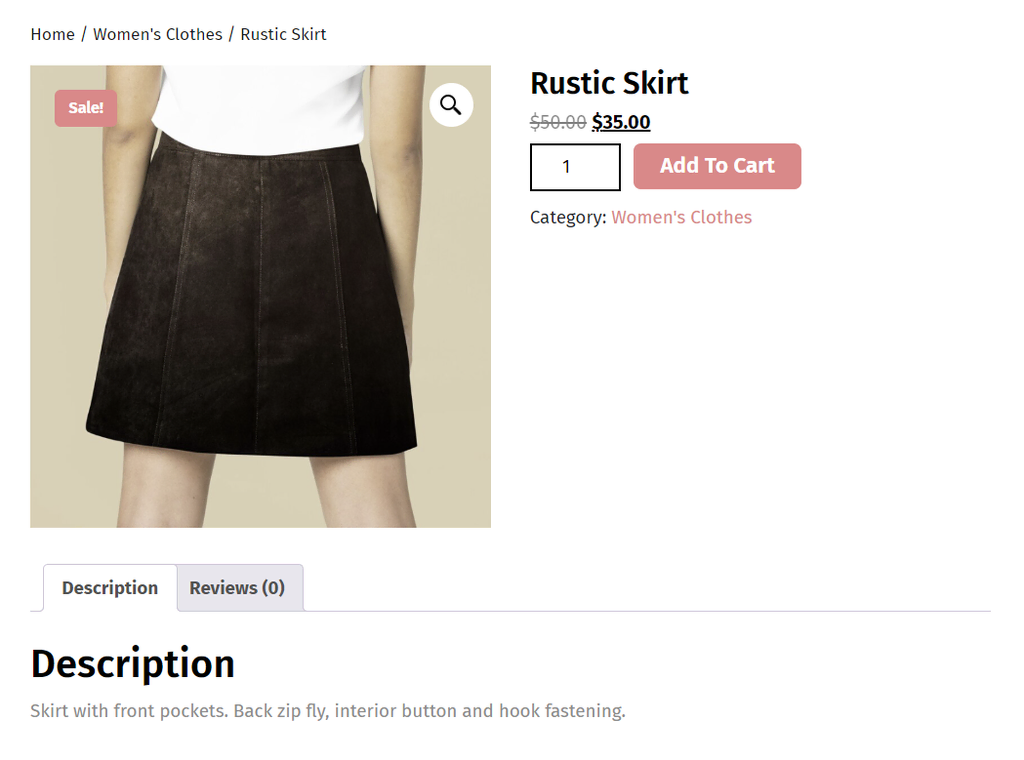
Here’s an example of a WooCommerce product page:
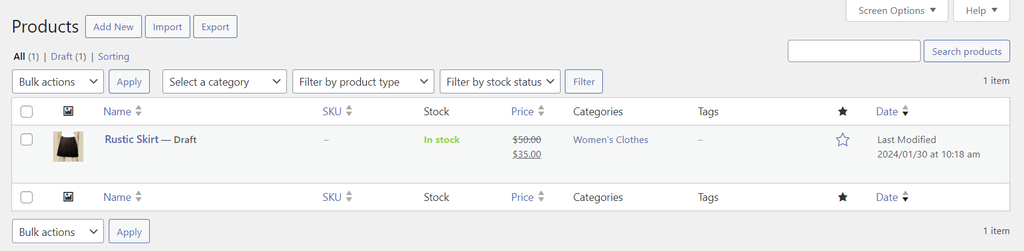
Manage all of your product listings via Products → All Products. Filter items by product type and stock status as needed.
Creating compelling product listings is critical to attracting and converting customers. For effective product pages, use high-quality images to showcase your products from different angles. Write detailed descriptions with relevant keywords and calls to action to improve search visibility and conversion rates.
7. Install Additional Plugins to Extend the Store’s Functionality
WooCommerce provides all the essential tools and features to run an online store. However, many excellent WooCommerce plugins are available to scale your WordPress site with advanced functionality.
Here are our recommended WooCommerce plugins to install:
- OptinMonster ‒ a popular popup builder for capturing visitors’ attention and boosting conversions.
- MonsterInsights ‒ integrates Google Analytics for online store performance and traffic monitoring.
- PluginHive ‒ offers free and premium extensions to integrate with various booking and shipping options.
- Weglot ‒ translate website content and meta descriptions to create a multilingual WordPress online store.
- WP Fastest Cache ‒ improves website performance and reduces load times for better search engine optimization (SEO).
- ATUM Inventory Management ‒ offers advanced inventory management tools with a quick editing feature.
Only install plugins that your business actually needs, as having too many plugins can slow down your eCommerce store. Get plugins from trusted platforms and update them regularly for compatibility with the latest versions of WordPress and other integrated tools.
Leverage WordPress auto-update features to automate the process for WordPress core, themes, and plugins. With our WordPress Enhanced Automatic Updates, you can log updates and roll back to specific versions from your hosting account.
What You Should Do After Creating an Online Store
Launching your online store is only half the journey. Here are some tips for growing your business and setting it up for success:
- Perform regular WordPress updates ‒ always use the latest versions of WordPress and WooCommerce core software, themes, and plugins to ensure optimal performance and security.
- Implement security best practices ‒ follow our security checklist to safeguard your WordPress website from cyber attacks.
- Optimize WooCommerce site speed ‒ regularly evaluate and enhance your website’s loading times to improve user experience and SEO rankings.
- Practice SEO ‒ boost your website’s visibility on search engines by implementing WordPress SEO strategies.
- Create a blog ‒ write informative blog posts about your products or industry to engage your audience and drive traffic to your site. Maintaining a regular publishing schedule helps drive traffic to your online store and establish authority in your niche.
- Start affiliate marketing ‒ partner with influencers or bloggers in your niche to grow your audience base and boost sales.
- Create an email newsletter ‒ build an email list to keep your customers informed about new products, promotions, and content.
- Analyze website performance ‒ regularly check your website speed and monitor user behavior using analytics tools for future improvements.
Conclusion
The eCommerce industry’s lucrative opportunities inspire more sellers to launch eCommerce stores. With various accessible eCommerce platforms to choose from, anyone can jump on the trend without needing coding skills.
Through this guide, you learned how to create an eCommerce website with WordPress and extend the store’s functionality with WooCommerce. Let’s recap the steps:
- Decide what to sell.
- Choose the right WordPress hosting provider.
- Install WordPress and configure WooCommerce settings.
- Set up payment methods.
- Pick an eCommerce theme.
- Add products to the eCommerce site.
- Install WooCommerce plugins for additional features.
We hope this article helped you launch a successful online store. If you have any questions, check out our FAQ section or leave a comment below. Good luck!
Suggested Reading for Kickstarting Your Online Business Venture
How to Make Money Online
Understanding eCommerce SEO and Best Practices
How to Create an Online Store With WordPress FAQ
This section covers the most common questions about building an online store with WordPress.
Can I Build an Online Store With WordPress?
Yes, you can turn your WordPress site into an online store using eCommerce plugins. We recommend using WooCommerce, a popular free plugin that adds eCommerce functionality to WordPress. It has a wide range of features and extensions to help you create a successful eCommerce store.
How Secure Is WooCommerce for Handling Online Transactions?
WooCommerce employs robust encryption and frequent updates to secure online transactions. It complies with the European General Data Protection Regulation (GDPR) and Payment Card Industry Data Security Standards (PCI DSS), ensuring a safe shopping experience for users and reliability for store owners.
Are There Any Ongoing Costs of Using WooCommerce?
Yes. While WooCommerce is free, running your self-hosted WordPress site requires periodic payments for the web hosting and domain name. Adding extra eCommerce features and customizing your store’s design with premium plugins and themes also incur additional costs.

Jordana is a Senior Content Writer with over 5 years of experience in digital marketing and web development. When she’s not busy with work, she dabbles in creative writing and movie reviewing. Follow her on LinkedIn.
