How to Make a Dedicated Server in Palworld

Palworld is an open-world survival game featuring farming, crafting, and hunting mechanics typical of the genre’s best titles. However, most importantly, players can capture both adorable and not-so-adorable monsters known as Pals, which assist in base building, travel, and combat.
This captivating and competitive scenario makes Palworld one of today’s most popular games with dedicated servers. To make this game even better, you can create a private host and play multiplayer with selected users, configure various settings, install mods, and reduce network latency.
In this article, we will explain how to set up a dedicated server in Palworld using Hostinger’s virtual private server (VPS) hosting. We will also show the manual method and the simpler one using our Game Panel.
Prerequisite: Purchase a Game Server Hosting Plan
Setting up a Palworld server on a VPS is a convenient and reliable solution, as leading Palworld web hosts like Hostinger offer a range of built-in features.
For example, we offer a VPS AI Assistant to help you generate commands and troubleshoot configuration issues.
When choosing the best VPS game hosting plan for Palworld, consider the following system requirements:
- Operating system – Linux or Windows.
- Processor – at least a quad-core processor.
- RAM – 8 GB or more, depending on the players.
- Storage – minimum 40 GB.
For Palworld dedicated servers with 32 players, we recommend 16 GB of RAM to ensure optimal performance. Based on these specifications, Hostinger’s Game Panel 4 plan is an excellent choice.
Besides powerful hardware, Hostinger’s Palworld server hosting includes the Game Panel, allowing you to set up a dedicated server for other games without writing a single line of code. We highly recommend this method because it is time-efficient and less prone to errors.

Video Tutorial on How to Make a Dedicated Server in Palworld
Can’t wait to venture into the world with your Pals? Watch and follow our video tutorial on how to make a dedicated server in Palworld!

How to Make a Dedicated Server in Palworld Using Hostinger’s Game Panel
Instead of using commands, Hostinger’s game hosting plan lets you easily install a Palworld dedicated server using a graphical user interface via Game Panel. It is simpler and suitable for beginners unfamiliar with Linux utilities.
After purchasing a hosting plan from Hostinger, complete the initial VPS setup wizard by setting the virtual private server password, name, and location.
Then, open the dashboard by clicking Manage on the plan, and you should see the server status as Running. Otherwise, start manually by clicking the button.
After ensuring that the server is running, follow these steps:
- Go to your VPS Overview menu → Panel Access. Click the Login URL.
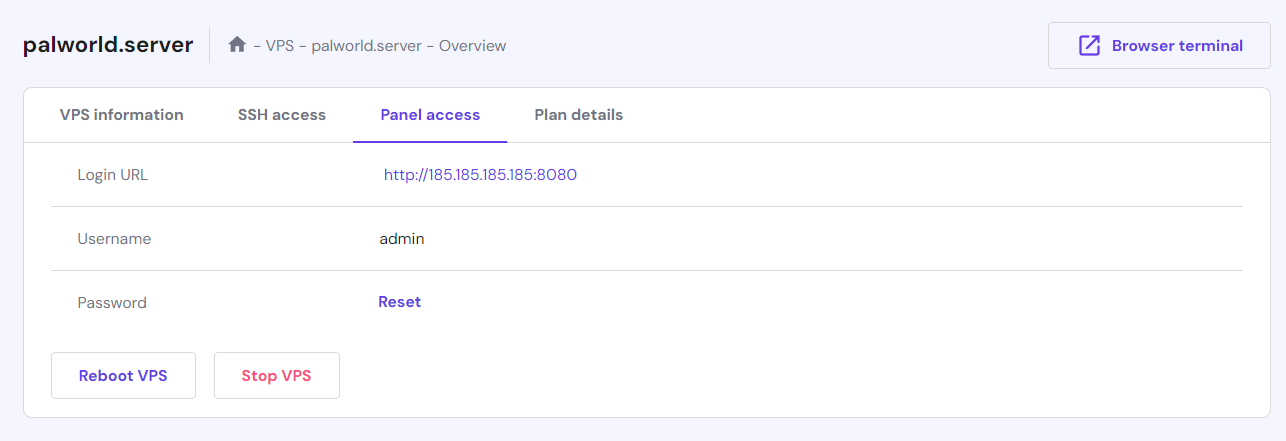
- On the login page, enter your admin panel username and password.
- Click Create Instance and select Palworld from the drop-down menu.
- Hit Create instance and wait until the creation process is complete.

That’s it! To connect to the server, launch Palworld and select Join Multiplayer Game. Enter your VPS IP address using the default port:
185.185.185.185:8211
Suggested Reading
Did you know our Game Panel supports other game server installations, including Enshrouded? Check out our article to learn how to set up your Enshrouded server.
How to Make a Dedicated Server in Palworld Manually
This section will explain the steps to make your own dedicated server for the Palworld Steam version, from setting up your VPS environment to installing mods to improve gameplay. Since we’ll use Debian, the Linux commands might differ depending on your distribution.
Important! Currently, Palworld’s dedicated game server is only available for the Steam version.
1. Set up Your VPS
To configure your VPS, connect via SSH using PuTTY, macOS Terminal, or Hostinger’s own Browser terminal. The server’s IP address and login credentials are available under the SSH access tab in the Overview menu.
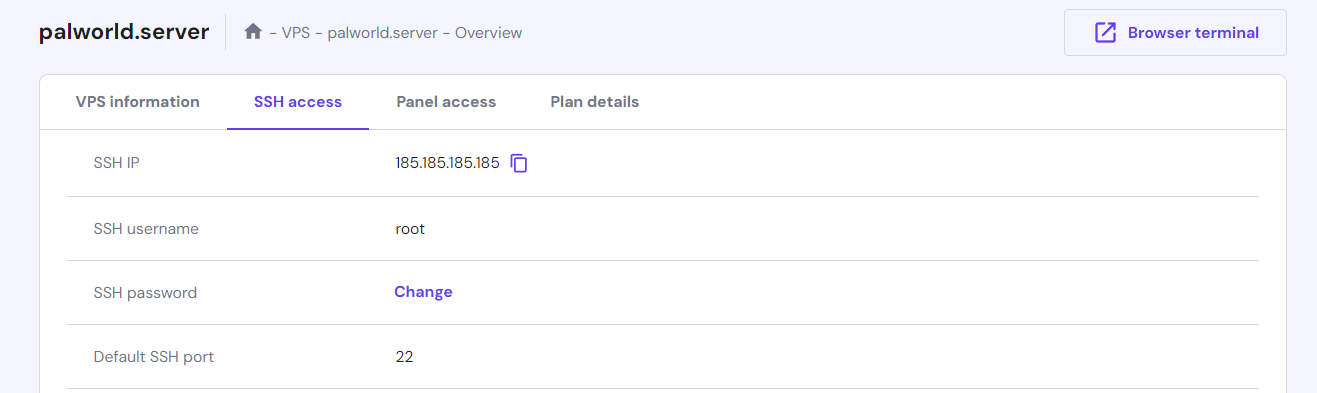
By default, you will log in as root. However, we recommend creating another Linux account with superuser privileges to prevent accidental command executions that might break your server. Here’s the command:
adduser account
Replace account with the actual username. Enter a new password and follow the instructions. Once finished, run the following commands to grant the superuser privileges and switch to the new account:
usermod -aG sudo account
su account
Next, configure the VPS firewall to open port number 8211, which Palworld uses to communicate with dedicated servers. Here are the commands:
sudo ufw allow 8211/tcp
sudo ufw allow 8211/udp
If your terminal shows the command not found error, it means the utility is disabled or uninstalled. Check our article to learn how to configure Uncomplicated Firewall (UFW).
Alternatively, you can add the firewall rules via hPanel by going to the VPS Overview → Settings → Security → Firewall. Select Create Firewall Configuration and enter the configuration name. Click the three dots icon and Edit to configure the rule.

Warning! Enabling UFW might block the SSH port, which can disconnect you from the server. After installing the tool, immediately add a new rule to allow SSH or its port, which is 22 by default.
2. Install SteamCMD and Dependencies
SteamCMD is Steam’s command line utility for downloading and installing Palworld dedicated server files. Before configuring the tool, update your APT repository using the following command:
sudo apt update && sudo apt upgrade
Then, download the SteamCMD dependencies. Start by installing the lib32gcc runtime library and software-properties-common package:
sudo apt install -y lib32gcc-s1
sudo apt install software-properties-common
Add the multiverse app repository and enable the 32-bit architecture support using these commands:
sudo add-apt-repository multiverse
sudo dpkg --add-architecture i386
Finish by synchronizing the APT repository and installing the SteamCMD package:
sudo apt update
sudo apt install steamcmd -y
In addition to SteamCMD, install Linux Screen to allow the server to keep running in the background after the SSH session ends. Here’s the command:
sudo apt install screen
You can also utilize another terminal multiplexer based on your needs and use cases. For example, use tmux if you need more flexibility and user-friendly navigation.
3. Download Palworld Server Files
Once the utilities and dependencies are ready, download the Palworld dedicated server tool using SteamCMD. Here’s the command:
steamcmd +login anonymous +app_update 2394010 validate +quit
Navigate to the newly created /PalServer directory within the steam folder using the cd command:
cd ~/Steam/steamapps/common/PalServer
The terminal might return an error if you didn’t run steamcmd in the home directory. To solve it, locate the correct /PalServer folder path using the Linux find command:
sudo find / -type d -name "PalServer"
Then, rerun the cd command with the correct path relative to your current directory. For example, if you are in the steamapps folder, enter:
cd /common/PalServer
4. Launch the Server
To start the Palworld dedicated server tool, navigate to the PalServer directory and execute the startup script:
./PalServer.sh
The terminal should output logs indicating that the server is running. However, you might encounter the following error:
.steam/sdk64/steamclient.so: cannot open shared object file: No such file or directory
To resolve it, stop the process by pressing Ctrl + C. Then, run these commands subsequently:
mkdir -p ~/.steam/sdk64/
steamcmd +login anonymous +app_update 1007 +quit
cp ~/Steam/steamapps/common/Steamworks\ SDK\ Redist/linux64/steamclient.so ~/.steam/sdk64/
Rerun the startup script. A similar error might still show up during the first boot, but PalServer should work if you see the following line:
.steam/sdk64/steamclient.so OK. (First tried local 'steamclient.so')
Currently, your Palworld dedicated server will shut down if you quit the session or disconnect from SSH. To keep it running in the background, start the script using Linux Screen.
To do so, return to your current account’s home directory using the cd command and run the following to start a new terminal session.
screen
Navigate to the PalServer.sh location and execute the script by running these commands subsequently:
cd ~/Steam/steamapps/common/PalServer
./PalServer.sh
Once the server is running, press Ctrl + A + D to detach from the Screen session. It will remain running in the background, and you can reconnect using this command:
screen -r
5. Configure Your Palworld Server
Executing the startup script without additional arguments will run the Palworld dedicated server using the default settings. Advanced users can insert the following commands to modify the host behavior:
- -port – change the dedicated server’s listening port.
- -players – set the maximum number of players.
- -useperfthreads – enable the perf system to track multi-threaded events.
- -NoAsyncLoadingThread – disable asynchronous loading threads.
- -UseMultithreadForDS – use CPU’s multithreading to run the dedicated server.
- -EpicApp=PalServer – set your VPS as a community server.
In addition, configure the PalWorldSettings.ini file to change your in-game server settings. To do so, navigate to the folder using this command:
cd ~/Steam/steamapps/common/PalServer/Pal/Saved/Config/LinuxServer
Open the file using a text editor like nano:
sudo nano PalWorldSettings.ini
By default, the file is empty. You can add various parameters like ServerName to change the server name and AdminPassword to set the admin mode access credential. Check out the following article to learn more about the Palworld server’s full settings and their values.
After adding your own server settings, save the changes by pressing Ctrl + X, Y, and Enter.
Instead of writing the settings manually, copy and paste the game’s configuration to the file. To do so, right-click Palworld on the Steam library and click Browse local files.
Find PalWorldSettings.ini and open it using Notepad. Copy the settings and paste them into your server’s .ini file using nano. Change the parameters and values according to your needs.
6. Connect to the Server as an Administrator
Once the dedicated server starts, launch Palworld from your Steam library and select Join Multiplayer Game. Connect by entering your VPS’ public IP address with the default port number:
185.185.185.185:8211
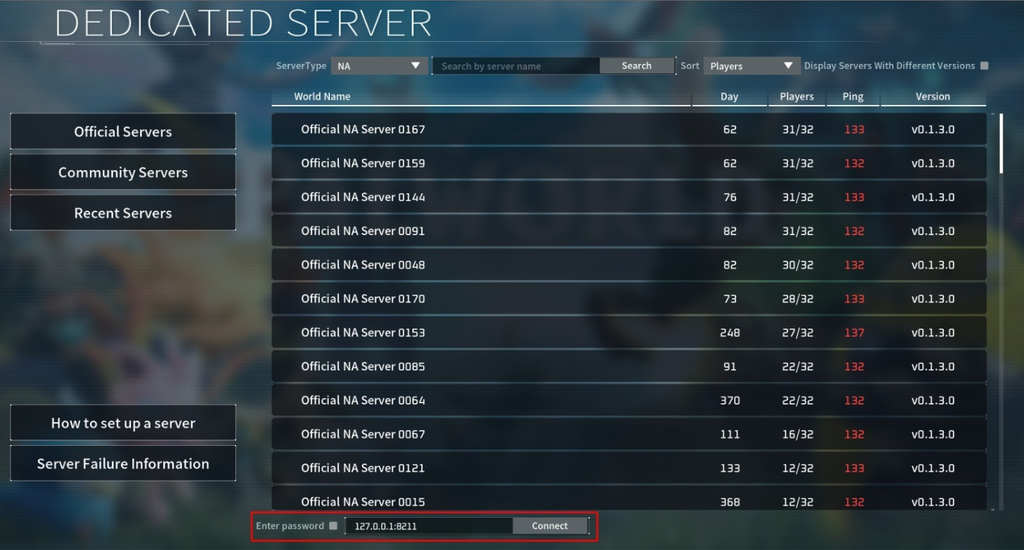
Other players can also join the multiplayer game in your dedicated Palworld server by entering the same address. Alternatively, they can connect via the Community Servers menu if you launch the host using the EpicApp argument.
After entering the game, hit Enter to access the chat and type the following to access admin commands:
/AdminPassword yourpassword
Replace yourpassword with the actual admin password. The game should confirm that you are now an administrator. If it doesn’t work, ensure you have added the AdminPassword setting in the PalWorldSettings.ini file.
As an admin, you can ban or kick players that ruin other’s gameplay experience. To do so, use the following command in the chat:
/BanPlayer playerID
/KickPlayer player ID
Check all players’ IDs using the /ShowPlayer commands. To see all banned users, navigate to the /Pal/Saved/SaveGames directory and open banlist.txt using nano. Remove the ID if you want to unban them.
7. Manage and Maintain Your Palworld Server
Regularly monitor your Palworld dedicated server to ensure optimal stability and security. You can use the htop command utility via SSH to display each process’ hardware load, including the CPU and memory usage.
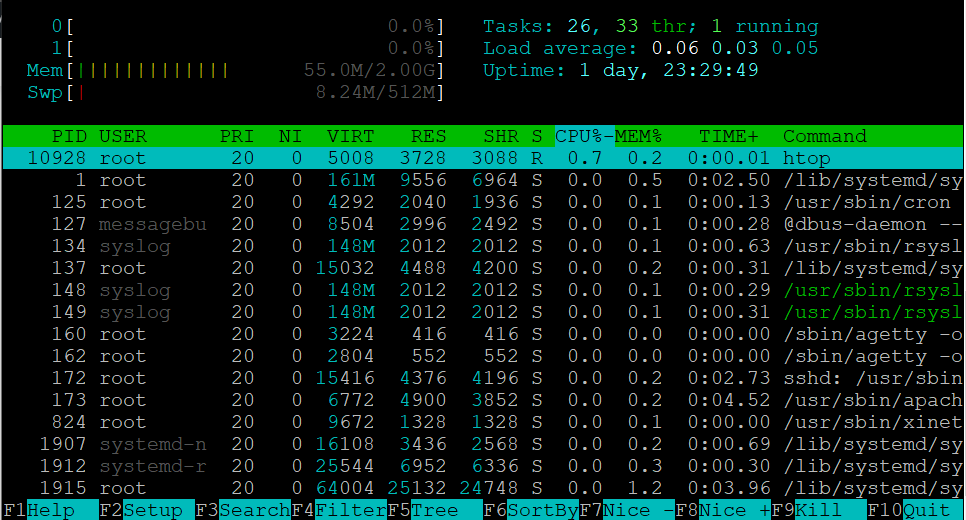
This information helps you optimize the server to maintain usability, like reducing the player slot to decrease RAM usage. Otherwise, the host might experience lag or even downtime when overloaded.
Also, ensure the installed packages are up to date to avoid security issues. Regularly run the following commands to check and install patches:
sudo apt update && sudo apt upgrade
In addition, some web hosts like Hostinger offer a built-in feature that helps simplify Palworld dedicated server maintenance. For example, we offer a snapshot and regular backups to ensure data safety.
Hostinger also has a built-in monitoring tool in hPanel, allowing users to track their Linux server performance via web browsers easily. In addition, we provide event logging and malware scanner features to simplify security audits.
8. Enhance Your Palworld Server
In addition to complete control and higher reliability, Palworld dedicated servers allow users to install numerous custom mods. For example, they can add graphic-enhancing extensions to make the game more visually appealing.
Others might use mods to improve gameplay, like enabling fast travel or changing the stamina depletion rate. You can find and download them from websites like NexusMod or CurseForge.
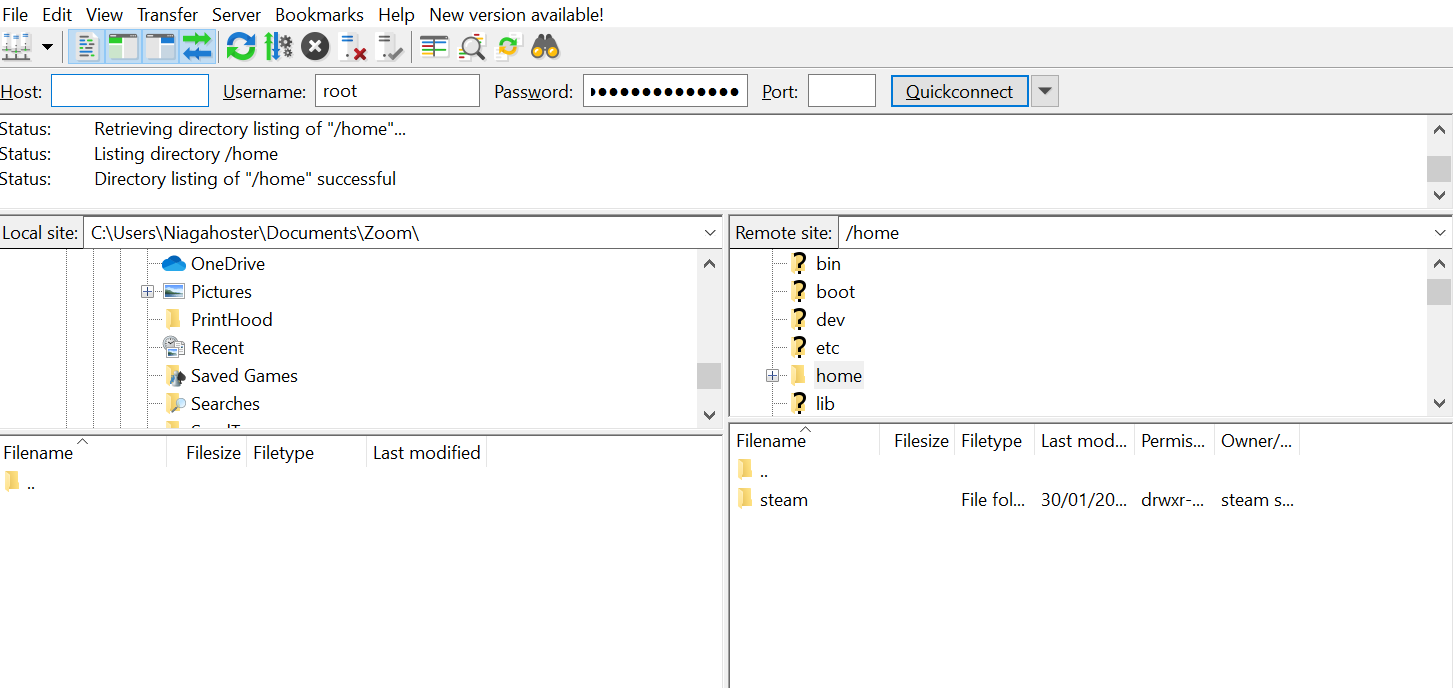
Depending on the mod types, the installation methods differ. For PAK extensions, simply extract the files to the Pal/Content/Paks directory, and the game will automatically load them. At Hostinger, you can do so using the FileZilla file transfer protocol (FTP) client.
Meanwhile, script-based mods require UE4SS, which is not compatible with Linux dedicated servers by default. To run the software, you must install a modded Linux Palworld dedicated server using the Wine compatibility layer.
Conclusion
Palworld provides public servers for users to join a multiplayer survival game. However, it offers limited customization, preventing you from managing the users or installing mods to improve the gameplay.
If you want more control, create a private host using a VPS hosting plan. The easiest and recommended method is using Hostinger’s Game Panel, which offers a graphical user interface that helps simplify the dedicated server setup process.
Simply create a new instance and select Palworld from a list. You can also change in-game settings by clicking the toggle and entering a new value.
Otherwise, set up the host manually by installing SteamCMD and downloading Palworld dedicated server files using commands via SSH. Then, start the host via Linux Screen and edit the .ini file to change the settings.
Suggested Reading
Explore our Palworld statistics to optimize your gaming experience.
How to Make a Dedicated Server in Palworld FAQ
To help you understand better, this section will answer several questions about how to set up a dedicated server in Palworld.
How Much Does a Dedicated Palworld Server Cost?
The cost of setting up your own server for Palworld depends on your web hosting provider and the number of users. For example, Hostinger’s Game Panel 4 plan costs $25.99/month and is suitable for up to 32 players, the maximum number the game supports.
How Do I Ensure My Palworld Server Is Secure?
Use a web host with robust security features. For example, Hostinger offers a malware scanner, a built-in firewall, and 24/7 infrastructure monitoring.
In addition, install tools like Fail2Ban to detect malicious login attempts and use a secure password for all accounts. Then, regularly audit logs to maintain safety.
Can I Install Mods on My Palworld Server?
Yes. You can install PAK mods by unpacking them in your Palworld dedicated server’s Pal/Content/Paks directory using an FTP client like FileZilla.
For the script-based mods, install UE4SS and add the execution command within its file. However, Linux users must use Wine as the software only runs on Windows.
What Should I Do if My Palworld Server Crashes or Experiences Issues?
Revert the last changes and check the system hardware usage to see if the problem is due to overloading. Then, review the server logs to identify the issues and possible solutions.
For Hostinger users, use our VPS AI Assistant or restore your server from the latest backup.

Aris is a Content Writer specializing in Linux and WordPress development. He has a passion for networking, front-end web development, and server administration. By combining his IT and writing experience, Aris creates content that helps people easily understand complex technical topics to start their online journey. Follow him on LinkedIn.

Paulius is as a Content Editor who excels in creating engaging technology-based content, while his keen eye for detail ensures accuracy in all aspects of his work. In addition to his role, Paulius brings 4+ years of valuable experience to the team, with a particular knack for crafting YouTube-related content. Beyond his professional know-how, he is more than willing to talk to you about everything board games.

Comments
March 23 2024
I want to play pal world it is a lovely game
March 26 2024
That's fantastic to hear ?