tmux Tutorial: Understanding What It Is, How to Install and Use It
Tmux is a tool that lets users create multiple virtual Terminal sessions in their system, each running an individual process. It works similarly to other multiplexers like GNU Screen but offers improved window management features.
In addition to improving task collaboration, tmux lets users maintain long-running processes in the background and save the Terminal state after disconnecting. This makes the tool suitable for managing a remote system like a virtual private server (VPS).
In this article, we’ll go over everything you need to know about using tmux. This includes the installation process, keyboard shortcuts, common use cases, and benefits over the traditional Terminal.
Download comprehensive tmux cheat sheet
What Is tmux?
Tmux is a Terminal multiplexer that lets you create multiple shell sessions in your system, each running a separate process. It keeps tasks running in the background, allowing users to continue their work later.
Tmux lets you create multiple Terminal sessions for efficient collaboration. To improve your workflow, you can also modify the settings via the tmux.conf file.
How to Install tmux
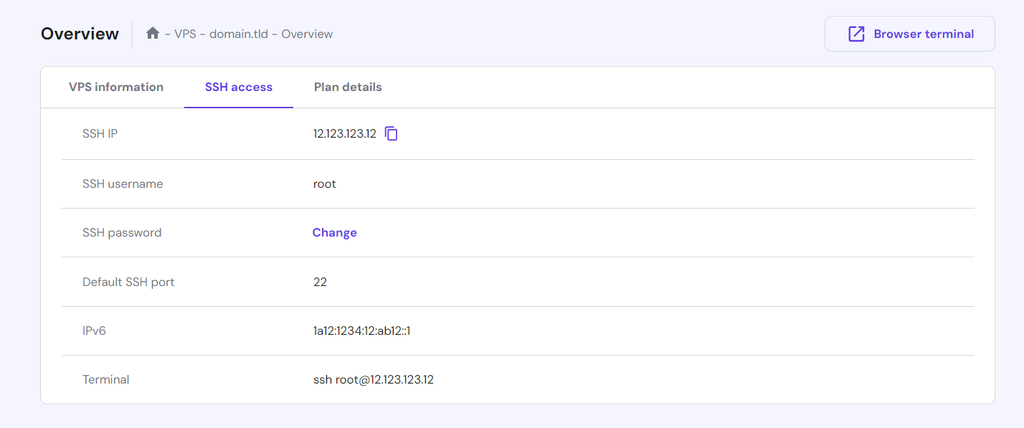
To set up tmux, log in to your remote system as a root using an SSH client like PuTTY. Hostinger VPS hosting users can find the credentials under the SSH access tab in hPanel’s VPS overview page.

Once connected, make sure to switch to another superuser since running the wrong commands using root might cause some serious issues:
su username
Before installing tmux, update your system’s package repository. This command will differ across Linux operating systems. As an example, here’s how to do it in Ubuntu:
sudo apt update
Then, run the following Linux command to install tmux:
sudo apt install tmux
Adjust the command according to your system’s package manager. For example, CentOS uses yum or dnf instead of apt.
After the tmux setup process is complete, check whether it is properly configured by querying the version:
tmux -V
If your Terminal returns the version number, tmux is correctly installed. Otherwise, it will output the “command not found” error.

In tmux, you can divide the Terminal into sessions, windows, and panes. They are dedicated, isolated shells in which you can execute commands or run processes without affecting others.
The only difference is their hierarchical structure, which provides modularity for efficient task organization. A session is a collection of windows, while panes are subdivisions of a single window.
tmux Keybindings and Shortcuts
The tmux keyboard shortcuts are essential for window and pane management. Here are some of the most useful key combinations and their functions:
- Ctrl-b + d – detach from the current session.
- Ctrl-b + % – split one window into top and bottom panes.
- Ctrl-b + “ – divide a window into two panes vertically.
- Ctrl-b + arrow – move to a different pane in a direction.
- Ctrl-b + x – close the current pane.
- Ctrl-b + c – create a new window.
- Ctrl-b + n – move to the next window based on the number.
- Ctrl-b + p – return to the previous window.
- Ctrl-b + ID number – jump to a specific window using the ID number.
- Ctrl-b + : – open the command line mode.
- Ctrl-b + ? – print all shortcuts.
- Ctrl-b + w – list all the windows in the current session.
Note that tmux shortcuts only work within a tmux session. Most importantly, for keybinds to work, you’ll need to press Ctrl-b before the key you want to use, as depicted above.
How to Use tmux
Let’s take a look at how system administrators can use the multiplexer for efficient command-line workflow. You will learn how to start tmux sessions, create multiple windows, split panes, and customize its settings.
Starting a New Session
To start tmux and create your first session, run one of the following commands in your main Terminal window:
tmux
tmux new
tmux new-session
Note that you should run these commands in the main Terminal window. While you can create a new one within an existing session, it’s not recommended and requires unsetting the $TMUX environment variable.
By default, a new tmux session will use an ID number for identification. However, you can give a custom name using the -s option:
tmux new-session -s [name]
Detaching and Attaching Sessions
After you create a new session, you will be automatically attached to it. To detach and leave the tmux client, press Ctrl-b + d.To reattach to the most recent session, use the tmux attach-session command. You can also reenter a specific shell by entering:
tmux attach-session -t [session-name]
Alternatively, reattach to a specific target session using its ID number. Since tmux starts the order from 0 by default, enter the following to access the first shell:
tmux attach-session -t 0
Managing Sessions
To list all active sessions, run either of the following tmux commands. You can do so within the main or virtual shell:
tmux list-sessions
tmux ls
Your command-line interface will show all sessions with details like their name, ID, number of windows, and creation date. You’ll also see which one you are currently attached to.

If you are currently in a virtual Terminal session, you can switch to another one using the following command. Similar to reattaching, use the name or ID number:
tmux switch -t [session-name-or-id]
To terminate the current session, enter exit or press Ctrl-d. Meanwhile, run this command if you want to shut down a specific one:
tmux kill-session -t [session-name-or-id]
Warning! Use the termination shortcut or command with caution since the deleted tmux session disappears permanently.
Creating and Navigating Windows
Your new tmux session will be a single Terminal window by default. To split it into two, press Ctrl-b + c. The new window will show up in the bottom status bar with its name and ID number.
Your current tmux window is marked with an asterisk (*). You can move to the next window by pressing Ctrl-b + n or return to the previous one using Ctrl-b + p.

Instead of cycling between multiple Terminal windows, you can directly jump to a specific one by pressing Ctrl-b + number ID. For example, press Ctrl-b + 0 to return to the first window.
Renaming and Organizing Windows
By default, tmux will create a new window called bash or sh. If you have many processes, distinguishing between them can be difficult, complicating task management.
Assign new tmux windows a custom name for simpler identification. To do so, navigate to the one you want to rename and press Ctrl-b + : to enter the tmux command mode. Then, run the following:
rename-window window-name
Replace window-name with your desired name. You should see the new window information on the session’s bottom status bar changes.

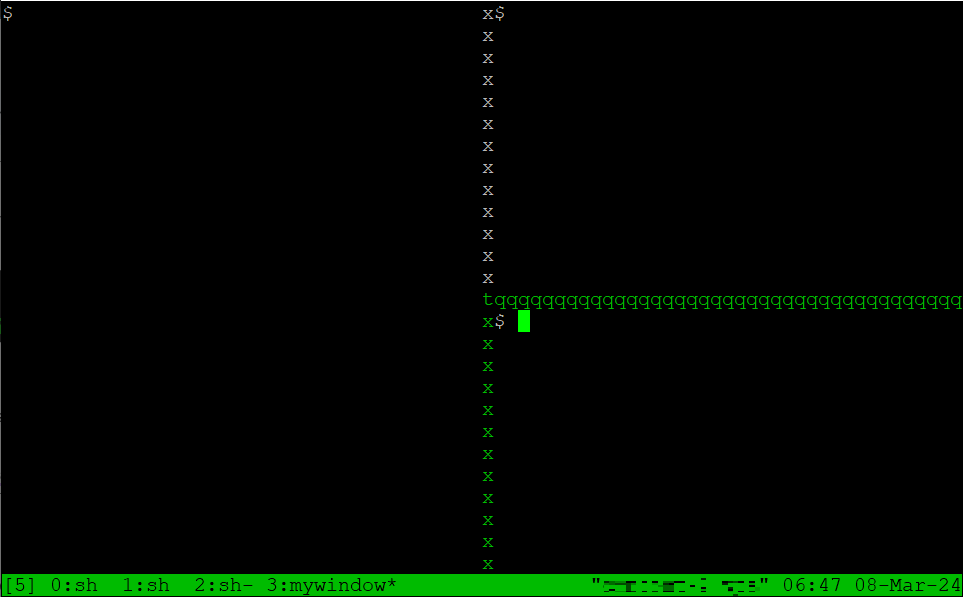
Splitting Windows into Panes
To organize a more specific task, split one window into multiple panes. Press Ctrl-b + “ to divide it horizontally or vertically using Ctrl-b + %.
You can repeat the window-splitting shortcuts to further divide panes into smaller working areas. For example, here’s what your current window will look like after separating it three times.
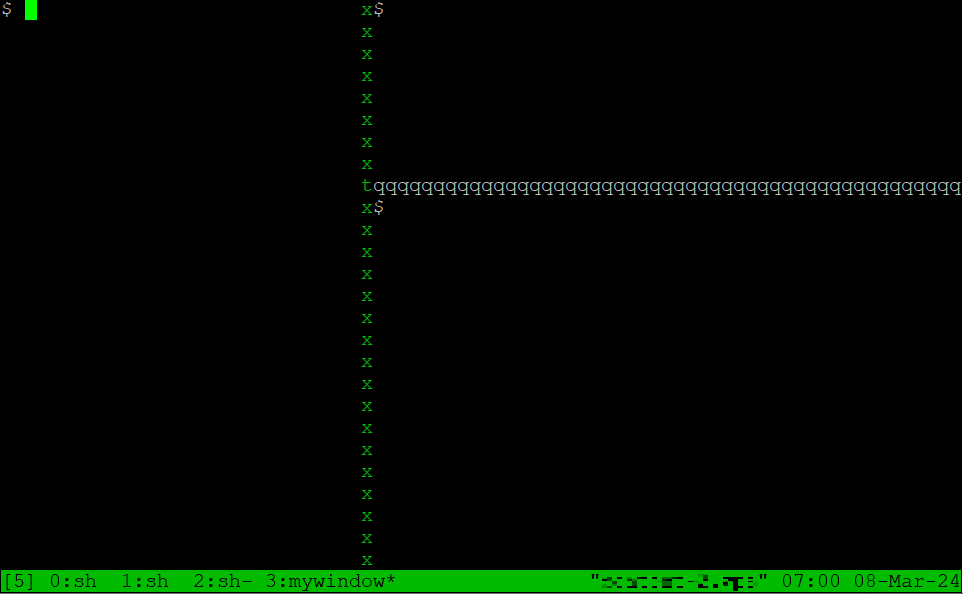
Navigating and Resizing Panes
To navigate between panes, press Ctrl-b + an arrow key according to your preferred direction. Your current position is highlighted with a green border.
You can also cycle to the next pane by pressing Ctrl-b + o, or return to the previous one using the Ctrl-b + ; shortcut.
By default, splitting a window will create two panes with identical sizes. To change the dimension, press Ctrl-b and hold Alt and the arrow button based on the direction for resizing.
Press up and down to change the height. Meanwhile, use the right or left arrow key to adjust the width.
Note that you can only modify the size once per keypress. If you want to make a pane twice smaller, you have to repeat the Ctrl-b + Alt-left shortcut.
Closing Panes
To terminate a pane, navigate to the one you want to close, then press Ctrl-b + &. However, we recommend avoiding this method since the lack of a confirmation message makes it prone to accidental deletion.
Instead, press Ctrl-b + x to close a pane safely. This will display a verification window, which you must confirm by pressing Y and hitting Enter.
Terminating panes won’t affect tasks in other sessions. Also, remember that this process is irreversible.
Customizing tmux
Tmux lets you create a configuration file that you can add code to, customizing its appearance and behavior. Depending on the scope, it can be local or global.
The local file applies to a specific user and is located in the account’s default bash directory. Run the following to create it:
sudo touch ~/.tmux.conf
Meanwhile, the global configuration applies system-wide and is located in the /etc directory. Here’s how to make one:
sudo touch /etc/tmux.conf
To add the configuration code, open the file using a text editor like Nano. You can change many settings, including the appearance and shortcuts. Check our tutorial about customizing tmux to learn more about the customization options.
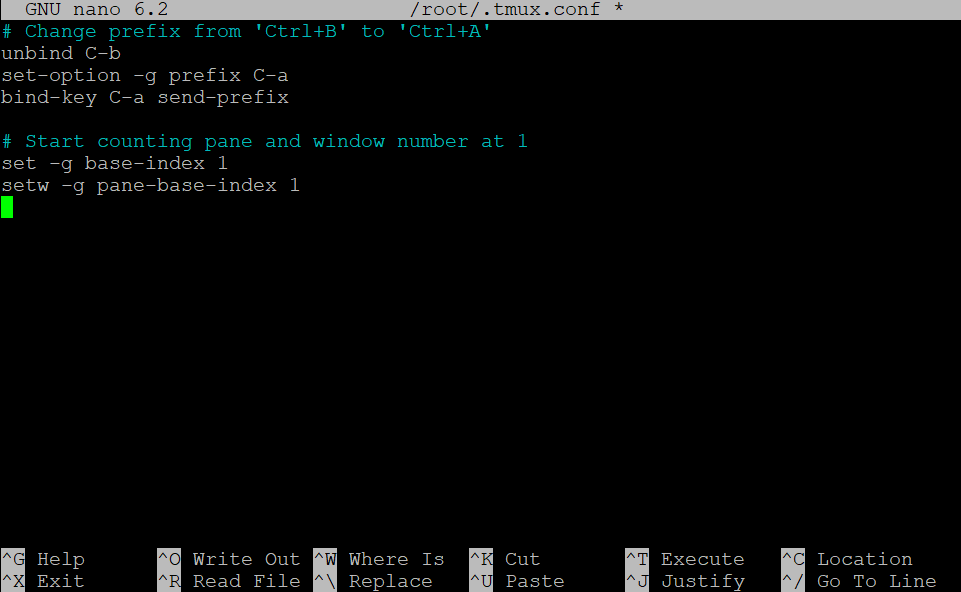
For example, the following snippet will change the default prefix key bindings from Ctrl-b to Ctrl -a:
# Change prefix from 'Ctrl+B' to 'Ctrl+A'
unbind C-b
set-option -g prefix C-a
bind-key C-a send-prefix
Moreover, you can modify the starting ID number. For example, the following tmux configuration code changes it from 0 to 1:
# Start counting pane and window number at 1
set -g base-index 1
setw -g pane-base-index 1
To save the changes, press Ctrl+X, Y, and Enter.
Why Use Tmux
In a traditional Linux Terminal, users can only work on one task per session and can’t continue their progress after disconnecting. Tmux helps resolve this issue by providing these benefits:
- Task and session management. System administrators can create multiple sessions to group tasks. They can also link windows, replicating one process on another for consistency.
- Multitasking. Users can detach from a session and reconnect to where they left off. It allows for efficient multitasking since they can work on multiple tasks seamlessly.
- Remote work. The tmux server preserves every running process, even when the user disconnects. It lets you reliably work on a remote system like a VPS without worrying about the SSH connection
- Long-running processes. Processes in tmux will remain active until the user terminates it. This feature is helpful for tasks like logging events or deploying an application.
Conclusion
Tmux is a multiplexer that lets you create multiple shell sessions in your system. These pseudo Terminals can run a dedicated process, which remains running even after you disconnect from the machine.
After installing the tool, run the tmux command to create a session and automatically attach to it. Detach by running attach-session -t and terminate it by entering exit. To list all sessions, use tmux ls.
You can split a tmux session into multiple windows by pressing Ctrl-b + c. Cycle between them using Ctrl-b + n or p. These windows will be called bash or sh by default, but you can rename them with the rename-window command.
To split the working area into smaller instances called panes, press Ctrl-b + “ or %, depending on the orientation. You can further customize tmux by modifying the ~/.tmux.conf configuration file.
tmux FAQ
To help deepen your understanding, this section will answer several commonly asked questions about tmux.
What Are the Benefits of Using tmux?
System administrators can create multiple tmux sessions to organize tasks and collaborate more efficiently. They can also keep processes running in the background, even after disconnecting.
Using tmux, remote work also becomes more efficient since users can continue where they left off in case of connectivity issues.
What Is the Difference Between tmux vs screen?
Tmux has several improvements over GNU Screen. For example, it offers more window management features, like renaming and linking.
Tmux also offers more configuration options, allowing you to fine-tune the tool to your specific needs. In addition, this Terminal multiplexer uses a more flexible native scripting language.
Can I Customize the Appearance and Behavior of tmux?
Yes. You can customize tmux for the current user by adding configuration code to the ~/.tmux.conf file. For system-wide modifications, use the /etc/tmux.conf file instead.
For example, you can recolor the window’s background, change the starting ID number, and add a new prefix key shortcut.

Ignas takes great satisfaction in helping people tackle even the most complex technical issues. His current goal is to write easy-to-follow articles so that these issues will not happen at all. During his free time, Ignas likes to play video games and fix up things around his house.

Aris is a Content Writer specializing in Linux and WordPress development. He has a passion for networking, front-end web development, and server administration. By combining his IT and writing experience, Aris creates content that helps people easily understand complex technical topics to start their online journey. Follow him on LinkedIn.

Comments
December 29 2021
This is probably the best short explanation of tux with one exception. You forgot to list one of the most powerful and useful commands.... CTRL B : setw synchronize-panes This allows you to type the command once and have it executed in every open pane. I.E. if you are installing Kubernetes on multiple nodes you can open an ssh session to separate nodes in each pane. Then typing the command "sudo yum install -y kubelet kubeadm kubectl" execute on the server in each pane simultaneously. (this assumes you have the kube repo setup) To stop the sync just type the command again... CTRL B : setw synchronize-panes
December 30 2021
Awesome, thanks Joe! I'll check with the team to include this in the article as well :)