How to Point a Domain Name to VPS Using A Records and Custom Nameservers
To use a custom domain name with a virtual private server (VPS), you must make a few DNS changes. Otherwise, your website will become inaccessible since the DNS server can’t resolve your domain into its IP address.
In this tutorial, we’ll show you how to point a domain name to VPS using three methods – changing the A record, configuring Cloudflare, or using custom nameservers.
Locating Details
Before proceeding, purchase a domain name from a registrar. In this example, we will use Hostinger. To future-proof and protect your branding, make sure to consider our Domain Bundle deal as well.
Keep in mind that the steps may differ depending on your domain registrar.
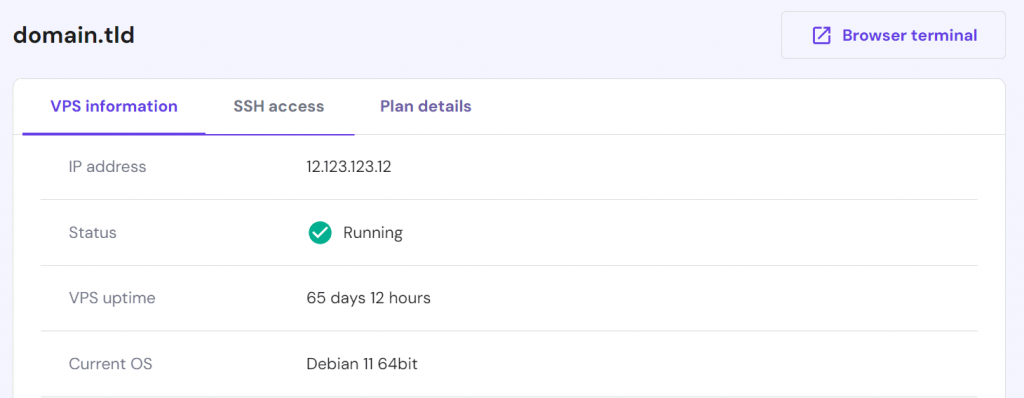
After setting up your Linux VPS, open Hostinger’s hosting control panel, hPanel. Click VPS and select the server in question. On the VPS information tab, copy your server IP address.
How to Point a Domain Name to VPS
In this section, we’ll explain three methods to point a domain name to your VPS, from the easiest to the most advanced. Since the outcome is the same, choose whichever suits your needs.
Point a Domain to VPS Using the A Record
The easiest way to point your domain is by modifying the A record type in your current DNS zone.
This method will keep your DNS zone file and existing record entries at the current provider. The approach is ideal for beginners or users who don’t want to alter their DNS zone location.
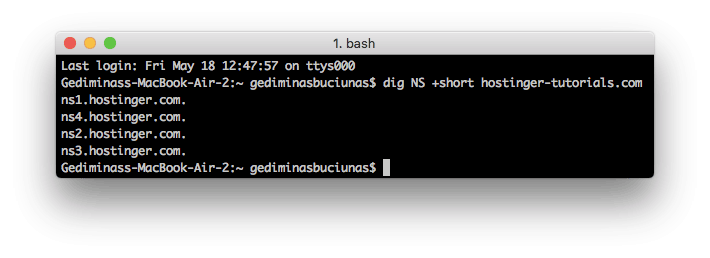
Before proceeding, use a DNS lookup tool to find the NS records and check your domain name’s current pointing location. Alternatively, use the dig command via Terminal:
dig NS +short domain.tld
If you purchased the domain from Hostinger, you can easily change the DNS record entries via hPanel:
- Navigate to hPanel → Domains and select the domain in question.
- Click DNS/Nameserver on the sidebar.
- In the DNS record tab, go to the Manage DNS records section.
- Find an existing A and CNAME record type in the DNS zone and replace their value with your VPS IP address.
Your DNS entries may look different depending on the approach. If you use two A records for the domain and www subdomain, here’s how the entries should look:
| Name | TTL | Type | Address |
| example.com | 14400 | A | 123.12.123.12 |
| www.example.com | 14400 | A | 123.12.123.13 |
Meanwhile, the entries should look like this if you use A and CNAME records setup for the domain and subdomain:
| Name | TTL | Type | Address |
| example.com | 14400 | A | 123.12.123.12 |
| www.example.com | 14400 | CNAME | example.com |
After you point the domain to the virtual private server, check whether the entries were added correctly. Use DNS checkup tools or enter the dig command via Terminal:
dig A +short domain.tld
If configured correctly, Terminal will return your VPS’s IP address as the A record. The DNS propagation time may take up to 24 hours, but flushing DNS can help speed up the process.
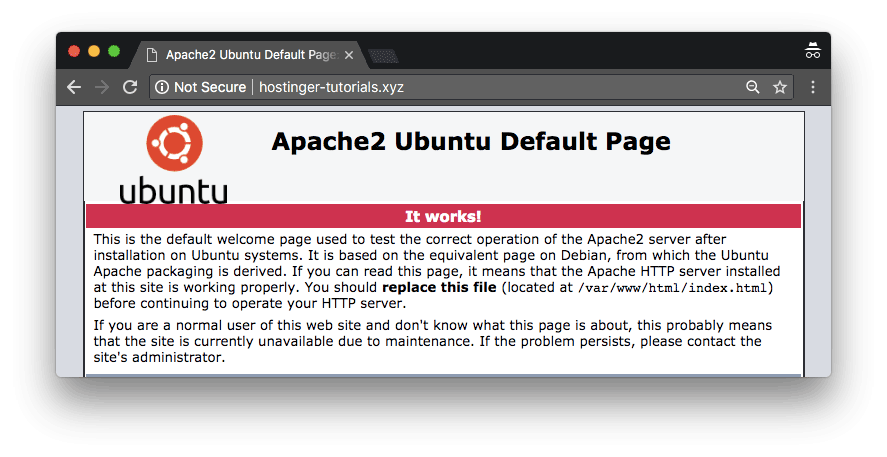
Once it’s complete, you will see a default loading page when visiting your domain.
Point a Domain to VPS via Cloudflare
Pointing a domain via Cloudflare requires extra steps. Fortunately, the procedure is similar regardless of your VPS hosting control panel.
In addition to changing the A record in DNS settings, you must assign the Cloudflare nameservers to your domain name.
To start, follow these steps to add your domain to Cloudflare:
- Create a new Cloudflare account.
- On the main dashboard, click Add site.
- Enter your domain name and click the Add site button.
- Select the free plan.
- Review the root domain records. Ensure the A record type points to your VPS IP address. Then, click continue.
- Copy both the Cloudflare nameservers and paste them into a text editor.
Now, change the nameservers on your registrar’s domain management panel. Here’s how to do it on Hostinger:
- Navigate to hPanel → Domains. Select the domain in question.
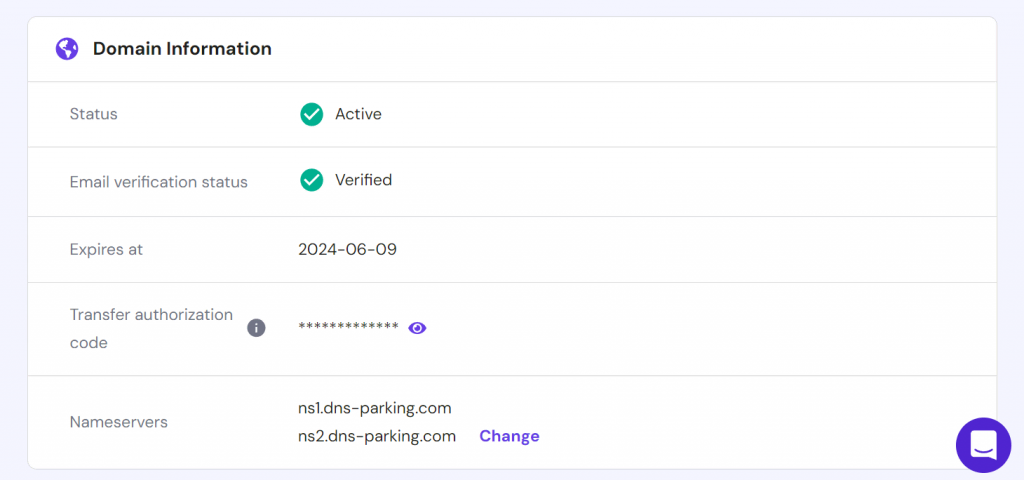
- On the Domain Information page, click Change next to the nameservers.
- Select Change nameservers.
- Paste the nameservers. Leave the other fields blank.
- Click Save.
Flush DNS to speed up propagation and wait until your domain becomes accessible. To verify if the DNS records are set up correctly, use a lookup tool or enter dig in Terminal.
Point a Domain to VPS Using Custom Nameservers
Pointing a domain via custom nameservers is trickier, as you must set up a new DNS zone on the virtual server. However, it allows you to use hPanel to control the domain for easier management.
This method will switch your DNS zone location to the VPS. It means you can manage all DNS-related settings through the newly created zone. To do so, follow these steps:
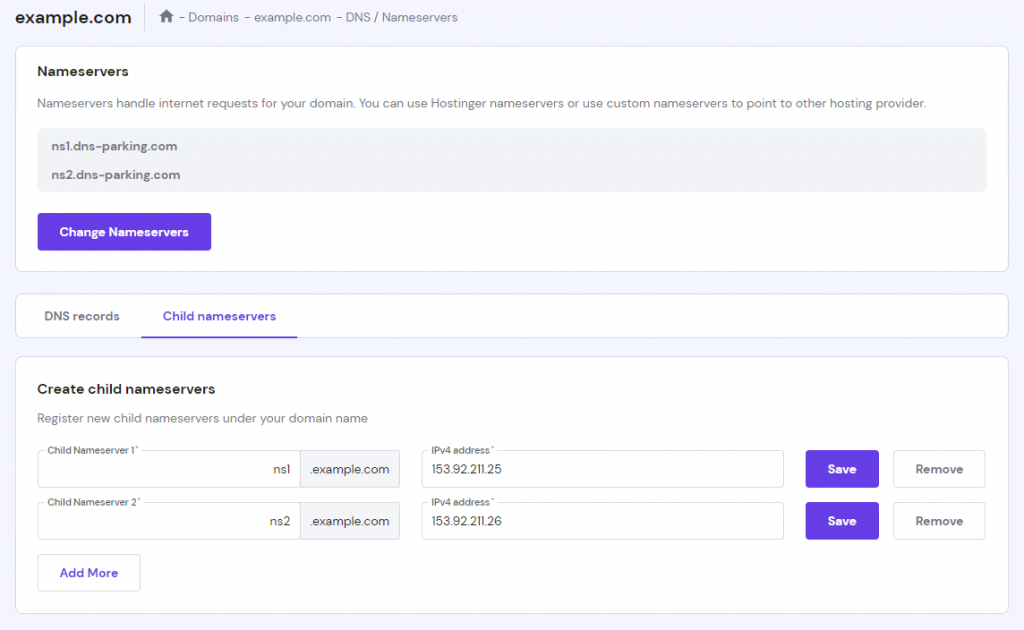
- On hPanel, navigate to Domains → DNS / Nameservers → Child nameservers.
- Enter your desired child nameservers, like ns1.domain.tld and ns2.domain.tld.
- Enter your VPS dedicated IP address in both fields.
- Click Save.
After completing the child nameservers setup, create a DNS zone on your Hostinger VPS hosting account. Before proceeding, run this command to ensure your VPS has the BIND service:
named -v
If you use Hostinger’s VPS operating system templates, it should be pre-installed. Otherwise, download and install BIND on your Linux machine. Then, follow these steps to set up the DNS zone on your VPS:
- Connect to your VPS via SSH using Terminal or applications like PuTTY.
- Enter the following to change the working directory:
cd /etc/bind
- Then, create a separate folder for the DNS zone files:
mkdir -p zones
- Access the newly created directory:
cd zones
- Use the nano command to create a new zone file for your domain. Replace domain.tld with your domain name:
nano domain.tld
- Enter the following snippet and replace the placeholder with your VPS IP address:
;
; BIND data file for domain.tld
;
$TTL    3h
@       IN      SOA     ns1.domain.tld. admin.domain.tld. (
 1        ; Serial
                         3h       ; Refresh after 3 hours
                         1h       ; Retry after 1 hour
                         1w       ; Expire after 1 week
                         1h )     ; Negative caching TTL of 1 day
;
@       IN      NS      ns1.domain.tld.
@       IN      NS      ns2.domain.tld.
domain.tld.    IN      MX      10      domain.tld.
domain.tld.    IN      A       123.12.123.12
ns1                     IN      A       123.12.123.12
ns2                     IN      A       123.12.123.13
www                     IN      CNAME   domain.tld.
mail                    IN      A       123.12.123.12
ftp                     IN      CNAME   domain.tld.
- Press CTRL + X to save and confirm the changes.
- On a new line, enter the following command to insert it the zone file the default bind configuration for DNS:
cd /etc/bind
nano named.conf.local
- Add the following lines in the bottom and make sure to edit the file name with the real values:
zone "domain.tld" {
      type master;
      file "/etc/bind/zones/domain.tld";
};
- Edit the named.conf.options file using the nano command to change the DNS forwarder. We recommend using a stable DNS forwarder like Google Public DNS:
nano named.conf.options
- Locate the following lines and change 0.0.0.0 to the forwarder’s DNS address:
// forwarders {
//      0.0.0.0;
// };
After adding the values, execute this command to check if the DNS zone file syntax is correct:
named-checkzone domain.tld /etc/bind/zones/domain.tld
If the syntax is correct, the output should be similar to:
After ensuring the file is correctly configured, run these commands to restart the DNS bind service:
/etc/init.d/bind9 restart
/etc/init.d/bind9 start
Once the DNS zone is set, change your domain nameservers to the new ones.
To point your domain to Hostinger, go to hPanel → Domains. Click the domain in question and click Change next to the nameservers.
Wait for the DNS propagation process and check the status using checkup tools or Terminal. Then, access your domain via a web browser to verify if it’s configured correctly.
Setting Up Reverse DNS Record
You may need to set up a reverse DNS record for various reasons, like tracking users or email origin. It lets the DNS server resolve your VPS IP address to the domain name, not the opposite.
To set up a reverse DNS, Hostinger users can add a pointer (PTR) record to VPS via hPanel. Here are the steps:
- On hPanel, click VPS on the top bar.
- Select the VPS in question and click Settings on the sidebar.
- Click the IP address tab → Set PTR record.
- Enter your domain name and click Save.
Once added, wait until the DNS servers fully propagate the PTR record.

Conclusion
Pointing your domain name to VPS is essential to make your website accessible online. In this tutorial, we have explained three different methods to do so:
- Changing CNAME and A records via the domain’s registrar DNS settings.
- Assigning VPS IP address to the A records and using Cloudflare’s nameservers.
- Creating custom nameservers and setting up the DNS zone on your VPS.
After changing the DNS settings, wait 24 hours until the propagation process is finished. Once the domain starts working, use the VPS to host your website or web applications.
Start Working on Your Linux VPS
How to Change Hostname on Linux
How to Use Tmux on Linux for Task Management
How to Start Working with Linux Screen
How to Point a Domain Name to VPS FAQ
In this section, we will answer several questions about how to point a domain name to VPS. If yours remain unanswered, leave it under the comments section below.
What’s the Difference Between Pointing a Domain to a VPS Using A Records and Nameservers?
Unlike A records, nameservers automatically match the DNS zone with your VPS hosting IP address. With the A record type, you must reconfigure the IP address whenever it changes. If your server IP address is static, we recommend using the A record to point to your domain name.
How Can I Find Out Where My Domain Is Currently Pointed?
You can use an online DNS lookup tool or the dig command via Terminal. Here’s the command’s syntax: dig NS +short domain.tld.
What Are Custom Nameservers, and How Can I Create Them?
The default nameservers are typically bound to the web hosting provider and contain branding like ns1.hostinger.com. Custom nameservers let you use different DNS servers unrelated to your hosting provider, like ns1.yourdomain.com. It improves branding and makes switching hosting providers easier.
How Do I Know if I Set up the DNS Records Correctly?
If your DNS records are set correctly, your domain points to the correct IP address and nameservers. Use a DNS lookup tool, run the dig command, or ping the domain to verify if it resolves to the right IP address.




Comments
August 03 2019
there is no bind folder in etc folder ....
August 03 2019
Its in lib64
March 24 2020
Great stuff indeed. No doubt DNS propagation is a time-consuming process. I checked the tool that you mentioned for the DNS Propagation, as I was Googling for more tool, So I came across a handy online tool dnschecker.org, that provides 300+ DNS servers for lookup comparing to other tools. I shared the tool for the better help of the users.
July 13 2020
in my case i have a Windows Server R2 VPS. Is there any instructions for this case? Thank you!
July 14 2020
Hey Alejandro! :) The procedure should be the same for Linux and Windows, as you are only configuring the DNS zone. For example - setting up the A record to your VPS is just showing your domain what IP address it's drawing content from. The configuration within the server could be different, for which you'd need to contact your VPS provider's support team, but the domain configuration should be exactly as it is on the guide above :)
August 07 2020
The last part where the child servers names are also added to the primary nameserver does not seem to work. I get the error that nameservers cannot be the same as the child server names. Any ideas? So if the primary nameserver cannot be empty and not be the same as the child server names... What are you supposed to put there?
August 28 2020
Does the below enable redirect to the 'www' version? I want example.com to be redirected to www.example.com Option 1 – Using two A records Name TTL Type Address example.com 14400 A 153.92.211.25 www.example.com 14400 A 153.92.211.25 Option 2 – Using A record and CNAME Name TTL Type Address example.com 14400 A 153.92.211.25 www.example.com 14400 CNAME example.com
November 06 2020
Hey siti! :) The examples you've given enable WWW so your website is accessible with WWW. However, it doesn't exactly redirect the website to www. You can use the following code in your .htaccess for most of the popular CMS to force a www redirect (this is a https://www.domain.com redirect, so it will force your HTTPS connection too):
RewriteEngine on RewriteCond %{HTTPS} off RewriteCond %{HTTP_HOST} ^www\. [NC] RewriteRule ^ https://%{HTTP_HOST}%{REQUEST_URI} [R=301,L] RewriteCond %{HTTP_HOST} !^www\. [NC] RewriteRule ^ https://www.%{HTTP_HOST}%{REQUEST_URI} [R=301,L]