Complete Guide to Image Optimization for Better Website Performance
Image optimization, in general, aims at making images more efficient for web use. Properly optimized images lead to faster page load times, ensuring your website runs smoothly and enhancing accessibility for users on all types of devices.
This article will be your guide in making your website’s images perform optimally. We’ll explore why it’s essential, introduce you to various optimization techniques, and recommend tools to help you streamline the process. To further enhance your site’s performance and ensure it operates smoothly, consider exploring additional website optimization tools to improve site speed.
What Is Image Optimization
Image optimization helps website owners modify images to ensure they load quickly and display correctly on various devices. It also helps maintain user engagement by finding the right balance between the smallest file size and acceptable image quality.
Some image optimization techniques include resizing, changing formats, compressing, and adjusting resolution.
Why Is Image Optimization Important
In addition to helping website owners ensure their visual content is engaging to site visitors, here are some other benefits of image optimization.
Enhanced User Experience
Websites with optimized images load much faster, which helps increase engagement rates, retain visitors for more extended periods, and have lower bounce rates.
Beyond loading times, optimized images ensure smoother transitions between web pages and less lag when users interact with your site’s features or components. This makes for a more enjoyable and less disruptive browsing experience.
Ultimately, a website that loads quickly and operates smoothly reflects positively on your brand. Users are likely to associate your site’s performance with a strong branding strategy, enhancing their overall perception of your business.
Improved SEO
An excellent user experience often results in a more SEO-friendly website.
Moreover, using descriptive alt texts and file names for images increases the chances of indexing and display in search engine results, especially for image searches. They help attract additional traffic, as users searching for specific images find your optimized content more easily.
Let’s take a look at this image:
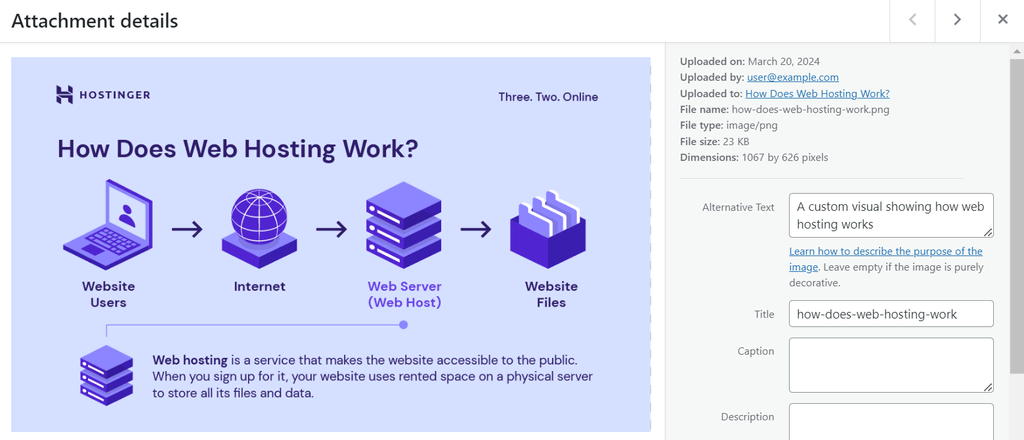
The 23 KB image size, appropriate file name, and descriptive alt text boost image optimization for better user experience and SEO.
Better Use of Resources
Optimizing your images reduces the data transferred between the server and the user’s web browser, leading to lower bandwidth usage. This factor is especially beneficial for websites with high traffic volumes or a large number of images.
Reducing image file size also means less energy consumption during data transmission, contributing to more environmentally sustainable web practices. This aspect is becoming critical as digital carbon footprints are subject to increased scrutiny.
9 Image Optimization Techniques for Web Use
Having high-quality images is counterproductive if they negatively impact your site’s performance. Let’s discover these nine tips on how to optimize images for web use.
1. Choose the Appropriate File Format
Choosing the right image format is crucial for image optimization, as each of them is designed with specific uses in mind. Therefore, by using the appropriate format, you maintain a good balance between keeping image quality and minimizing file size.
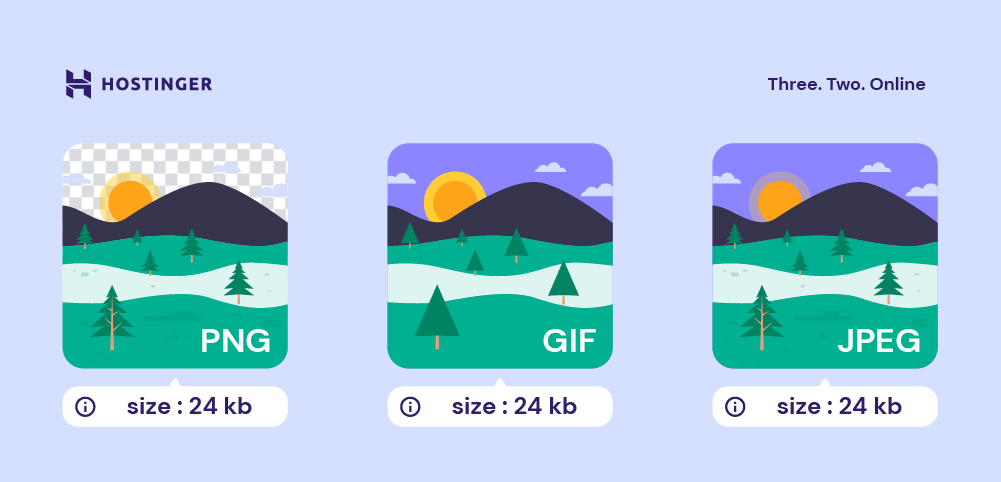
Here’s a quick overview of popular image file formats for website use:
- JPEG/JPG. Ideal for photographs and real-life images due to its ability to compress file sizes significantly while maintaining reasonable quality.
- PNG. Best suited for images requiring a transparent background, such as vector images with text, line drawings, and icons. PNG files retain higher quality but often at larger file sizes compared to JPEG images.
- GIF. Primarily used for animated images. While not ideal for high-quality pictures due to the limited color palette, GIF formats are perfect for storing simple animations.
- WebP. A modern format tailored for online platforms, making it increasingly the best choice for web use. The WebP format provides smaller file sizes than JPEG and PNG images with comparable quality.
2. Compress Your Image Files
The easiest and most popular method for optimizing images is compression, which can be achieved through two approaches – lossy or lossless.
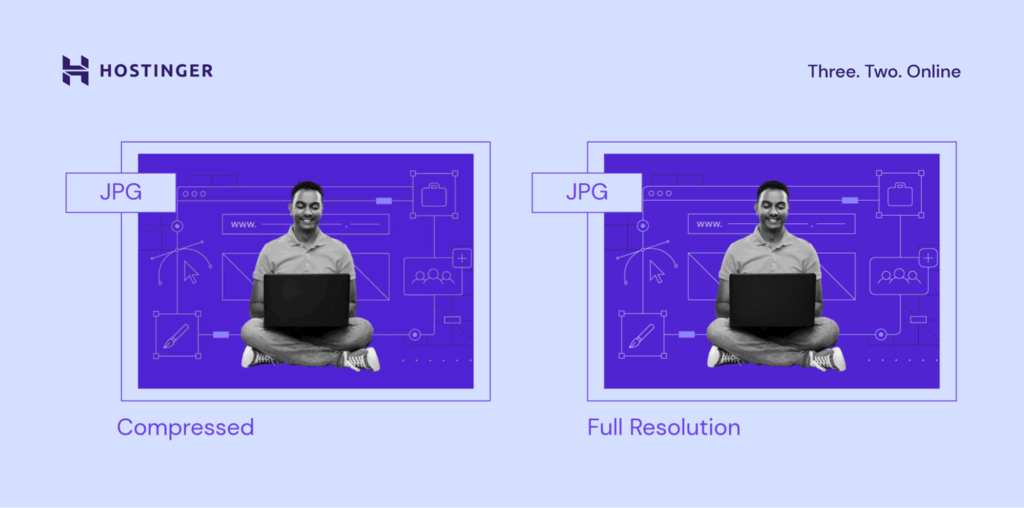
Lossy Compression
Lossy compression works by removing some of the image’s data, specifically details that are less likely to be noticed. It can significantly reduce file sizes, making images much lighter and faster to load.
This image compression method is ideal for large photos or detailed images used as backgrounds or decorative elements, where the highest resolution is not critical. The JPEG/JPG format typically employs lossy compression.
However, don’t re-edit and save images in a lossy format repeatedly, as this process can degrade quality over time. For this reason, we recommend having a backup of the original image for any future edits.
Lossless Compression
Lossless compression compresses images by optimizing the image data itself. All original details are preserved and can be fully restored upon decompression.
In addition to minimal quality loss, the file size reductions are generally less dramatic. Hence, this optimization method best suits images where precision and clarity are paramount, such as icons and logos. The PNG image format is known for using this type of compression.
Let’s review some practical tips for image compression:
- Tools and software. Utilize image editing software that offers fine-grained control over compression settings, for example, GIMP. Such tools allow you to visually compare the original and compressed image to ensure the quality is acceptable.
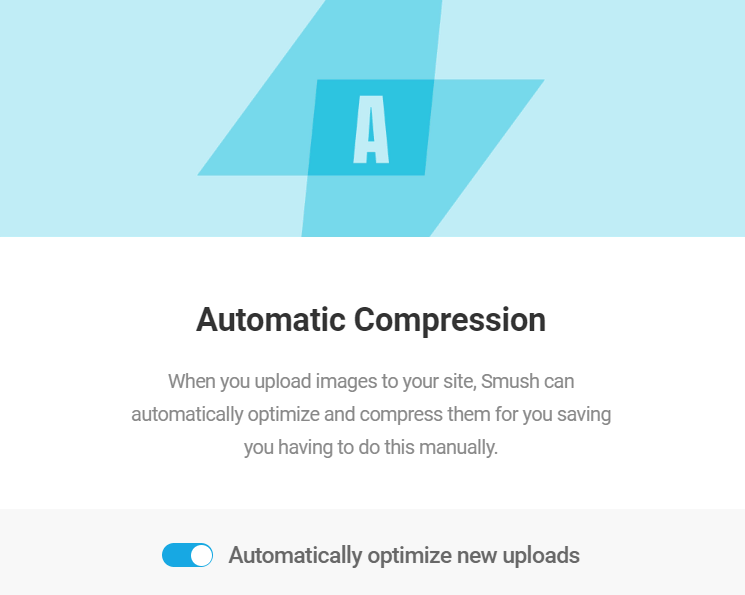
- Automated compression. Ask your hosting provider if it offers a server-side tool that automatically compresses images upon upload. You can also install a WordPress plugin like Smush to optimize new uploads automatically.
- Testing. After compression, try accessing your content on different devices and screen sizes. This process ensures your images maintain acceptable quality and load efficiently.
3. Place Your Image Strategically
Effective image optimization also involves careful image placement.
Images should complement and enhance the textual content, not just serve as a break in long passages of text. Ensure that each image has a clear connection to the surrounding written material, reinforcing the message or information being conveyed.
For example, on a product page for a high-tech running shoe, consider including the following:
- High-quality product images of the shoe from multiple angles to grab attention.
- Lifestyle photos showing the shoes in use help customers visualize the product in everyday use.
- Close-up shots of unique features, like the sole tread or lacing system, next to the feature description. These elements provide visual reinforcement of the product’s benefits.
4. Consider Your Image Accessibility
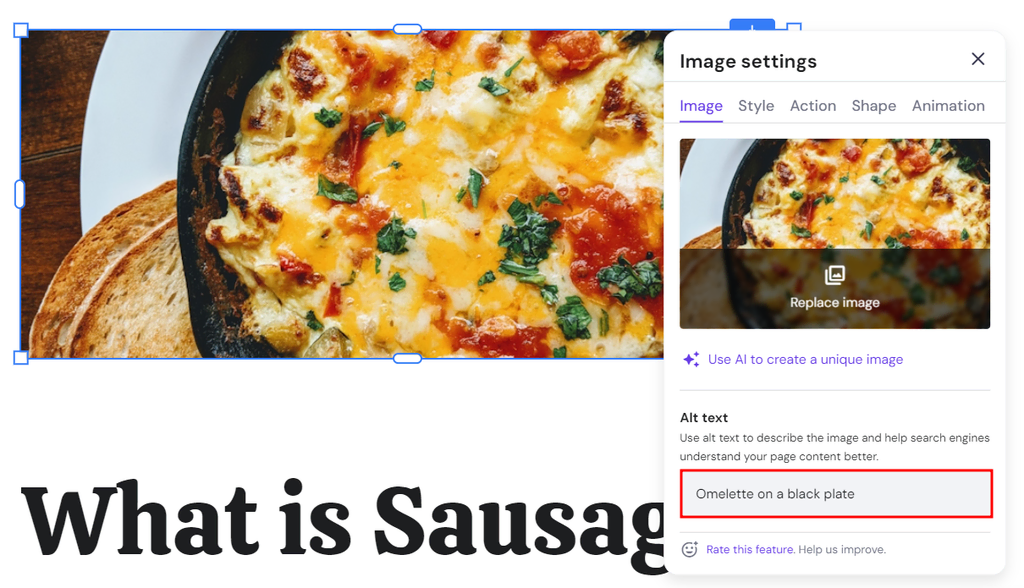
Accessibility is another crucial factor in serving optimized images. Screen readers, such as Narrator and JAWS (Job Access With Speech), cannot interpret text within images. Therefore, it’s essential to provide descriptive alt texts for all images.
Short for alternative text, it’s a concise description of an image. On Hostinger Website Builder, you can add an alt text by clicking the intended image. On the Image settings pop-up window, fill out the Alt text field like so:
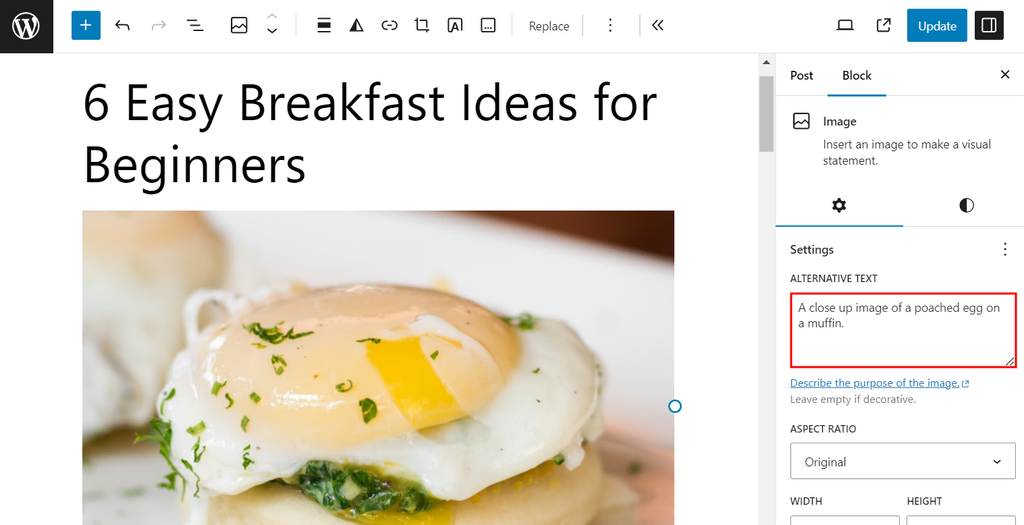
On WordPress, you can add an image alt text by clicking the image and filling out the Alternative Text field on the right panel:
Besides aiding website visitors who rely on assistive technologies, alt texts contribute to a site’s image SEO by making visuals more discoverable in Google image search results.
Google uses alt texts as part of its indexing process. When you include descriptive alt texts for your images, these descriptions help the search engine understand what the images are about. As a result, the images are more likely to appear in relevant search queries.
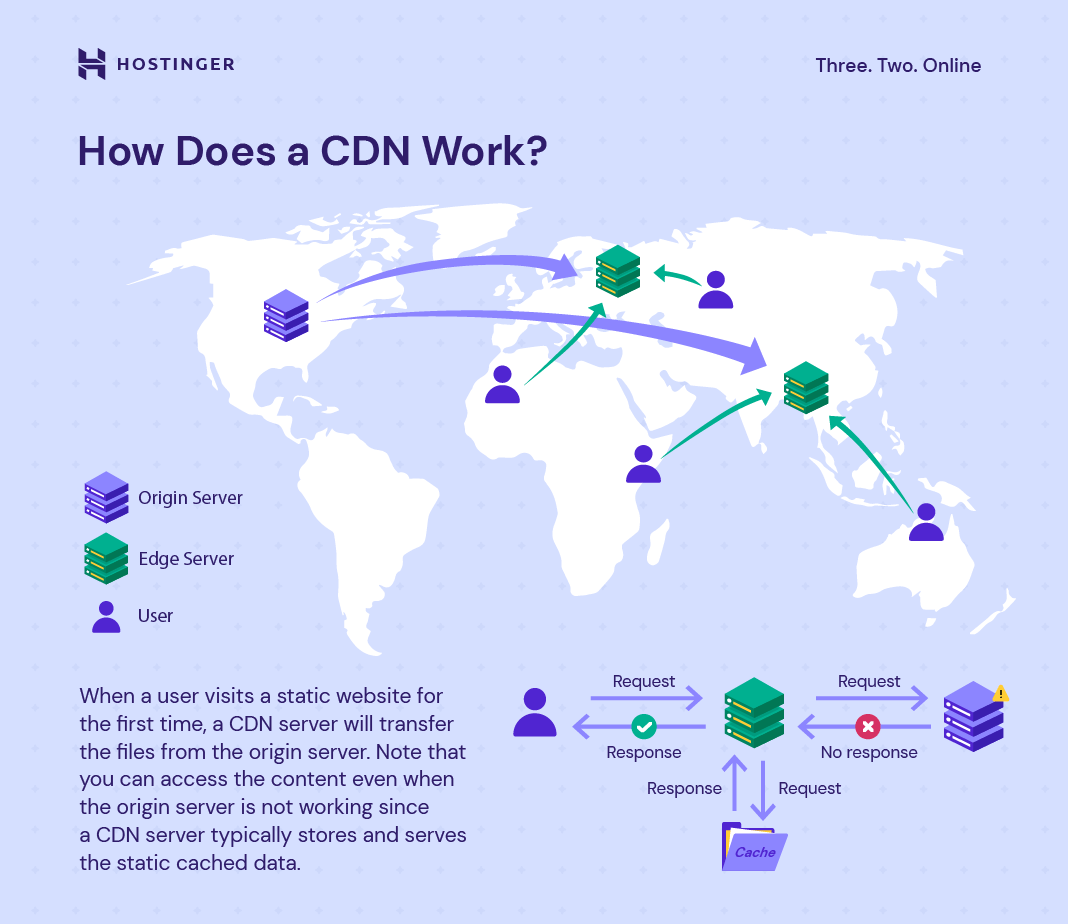
5. Serve Images via CDN
A content delivery network (CDN) is a system of distributed servers that deliver content, including images, to users based on the users’ locations. By serving images from a location closer to the user, CDNs reduce loading times.
Integrating a CDN into your website typically involves changing your image URLs to point to the CDN:
- You generally start by signing up with a CDN provider like Cloudflare.
- Next, upload your site’s static content, including images, to the CDN.
- Once the upload is complete, you’ll need to update your website’s code to make image URLs point to the CDN instead of your server.
For detailed instructions, you can refer to your chosen CDN’s documentation or support resources.
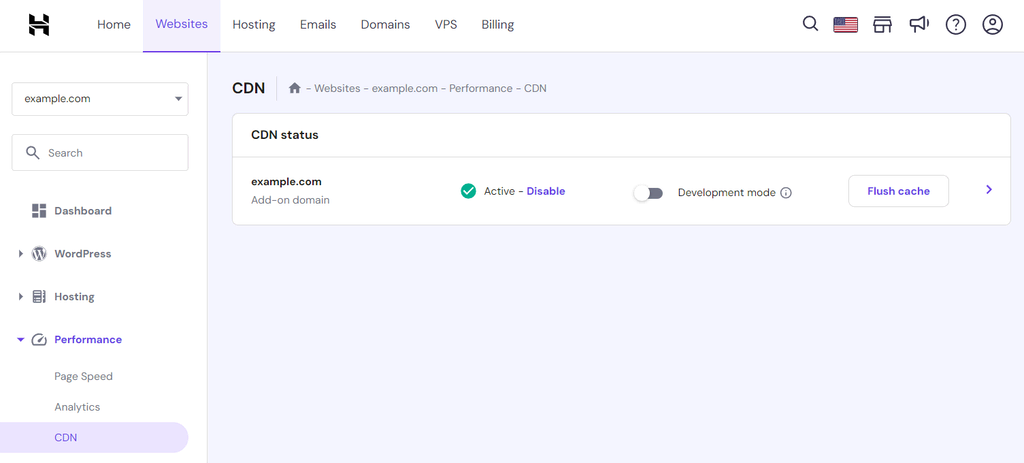
Subscribe to our Business plan or higher to enable our in-house Hostinger CDN. Here’s how:
- Within hPanel, navigate to the Websites section and click the Manage option next to the desired website.
- In the Performance section, look for the CDN option to activate it.
6. Use the Right Image Dimensions and Aspect Ratio
Image dimensions are the width and height of an image measured in pixels. An image might have dimensions of 1920×1080 pixels, where 1920 is the width, and 1080 is the height.
The dimensions of an image directly impact its resolution and detail, with larger dimensions typically providing the potential for higher detail and clarity. They also significantly influence the image file size and how it appears on different devices.
Consequently, optimal dimensions ensure that the image fits well within the layout of a webpage without unnecessary scaling.
Tailor images for common desktop resolutions like 1920×1080 pixels to ensure they’re impactful yet optimized for performance. For excellent mobile performance, a maximum width of 800 pixels can ensure images are clear.
Aspect ratio, on the other hand, shows how an image’s width and height compare to each other, regardless of its actual size in pixels.
Expressed as two numbers separated by a colon, common aspect ratios include 4:3, 16:9, and 1:1. They’re crucial for ensuring that images display correctly without distortion across different devices and platforms. For instance:
- 4:3 is a traditional aspect ratio used for standard-definition television and early computer monitors.
- 16:9 is widely used for high-definition television, widescreen computer monitors, and smartphones.
- 1:1 is a square aspect ratio popular on social media platforms for profile pictures and certain types of posts.
7. Implement Image SEO
Image SEO involves a series of practices designed to make your images more discoverable and to enhance the overall visibility of your site in search results.
In addition to alt texts, writing descriptive keyword-rich file names is essential. Such file names provide search engines with additional context about your content, aiding in more accurate indexing. For example, a file named vintage-red-car.jpg is more informative to search engines than image1.jpg.
Structured data also plays a significant role in image optimization. These data include details like the creator and license. Using schema markup for structured data helps search engines index your images effectively, increasing their chances of appearing in rich snippets.
8. Utilize Lazy Loading
In lazy loading, images are loaded only when they are about to appear in the device’s visible area or viewport. Meaning that images further down the page won’t load until the user approaches their section.
To manually implement lazy loading on your website, you can utilize the HTML loading=”lazy” attribute. Here’s how to do it:
- From your WordPress dashboard, head to the webpage where the image is to be displayed. For example, Posts → Edit Posts.
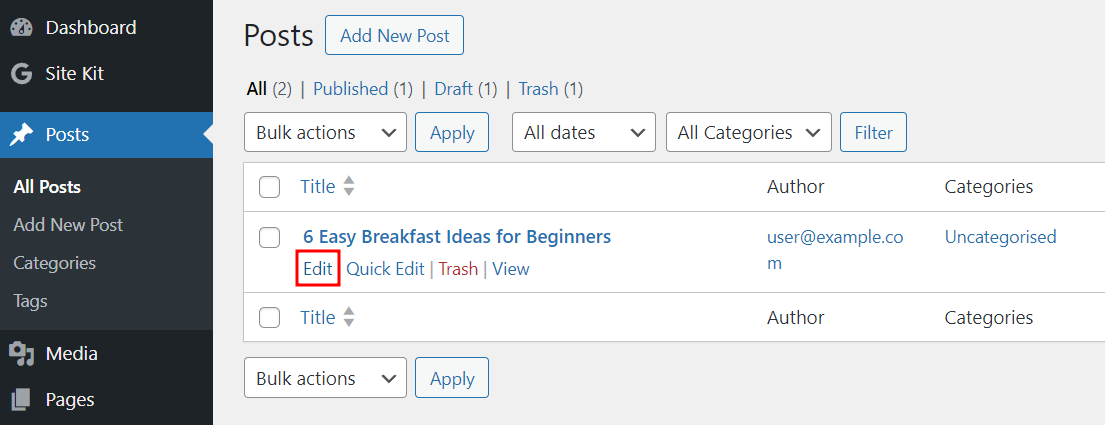
- Open the code editor by clicking the three dots, also known as ellipsis.
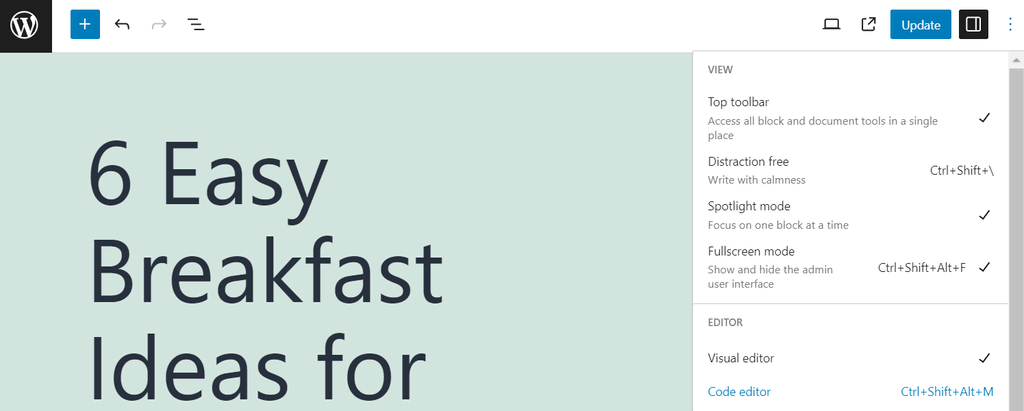
- Press Ctrl + F and type <img to locate all the <img> tags.

- Add loading=”lazy” to the <img> tags. Here’s what it looks like in the WordPress site code editor:
For a more straightforward solution, you can activate lazy loading without coding with an image optimizer like Smush. The process is simple and usually just requires toggling a button.
9. Test and Monitor Website Performance
Testing and monitoring site performance after image optimization is crucial to ensure that your efforts result in positive impacts. Utilize performance testing tools to gain insights on website speed, server response times, and overall site performance.
Google PageSpeed Insights, for example, provides information on your website’s performance on both mobile and desktop devices. It also offers specific recommendations for improvement, including image optimization.
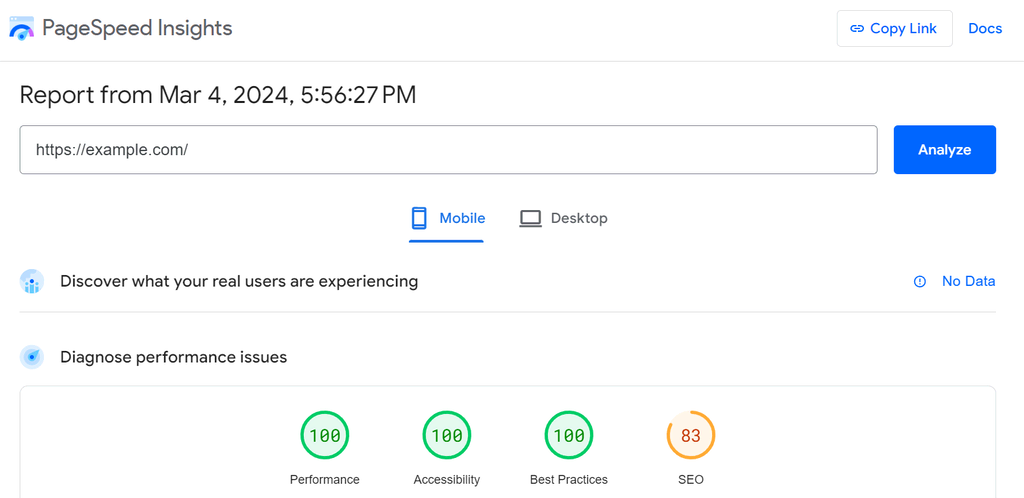
Once you run the test, look for improvements in key metrics. For example, the largest contentful paint (LCP) score indicates how fast the main content of a page becomes visible to users.
You can also check for any recommendations the tool makes regarding images. They might include further compression, format changes, or the use of modern formats like WebP.
Furthermore, Google Analytics can provide insights into website visitors’ experiences before and after image optimization. Pay attention to metrics like page load time, page views per session, and bounce rate, as improvements in image optimization can positively affect them.

On top of all, image optimization is an ongoing process. As you add new content or as web technologies evolve, continuous monitoring is crucial in maintaining and improving performance.
Regularly revisit your site’s performance using the tools as mentioned above, and stay updated on best practices for image optimization to implement new techniques as they become available.
6 Best Image Optimization Tools
For an easier image optimization process, here’s a quick recap of six best image optimization tools to consider:
1. GIMP
GIMP, an open-source image editing software, offers a powerful and free alternative to premium tools like Adobe Photoshop. When it comes to compression, GIMP offers advanced manipulation techniques, including allowing you to adjust compression levels.
To optimize images using GIMP, you can start by resizing the image file using the fixed width and height method. Here’s how:
- Import your image to GIMP by clicking File → Open and choose one from your local computer.
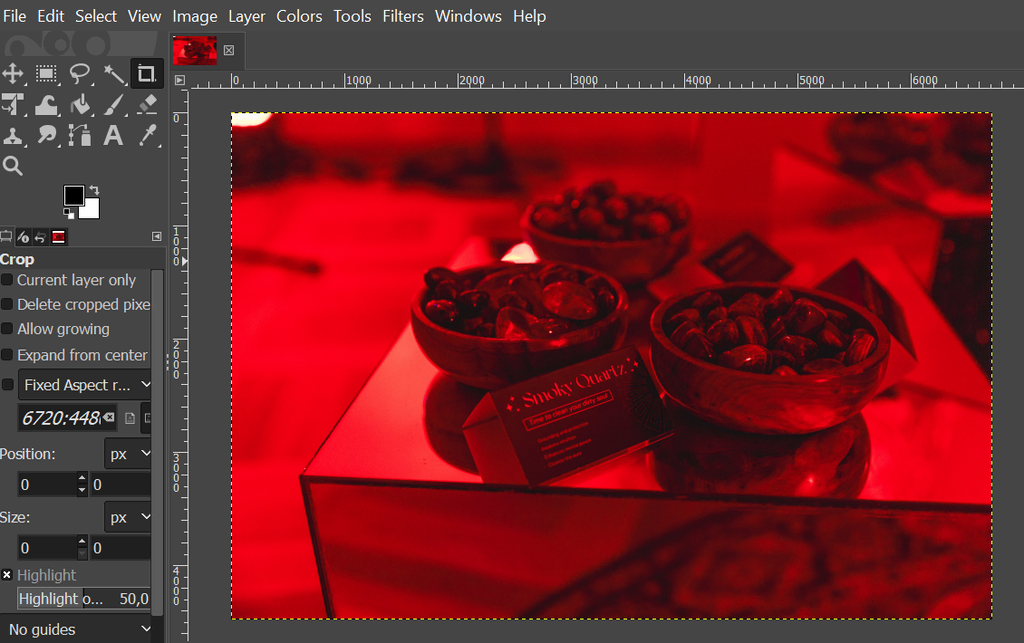
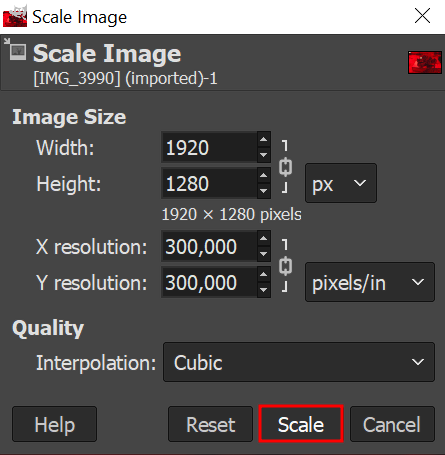
- Head to Image → Scale image, and adjust the width and height under Image size. For example, we change the width to 1920, and the height automatically adjusts. Then, click Scale.
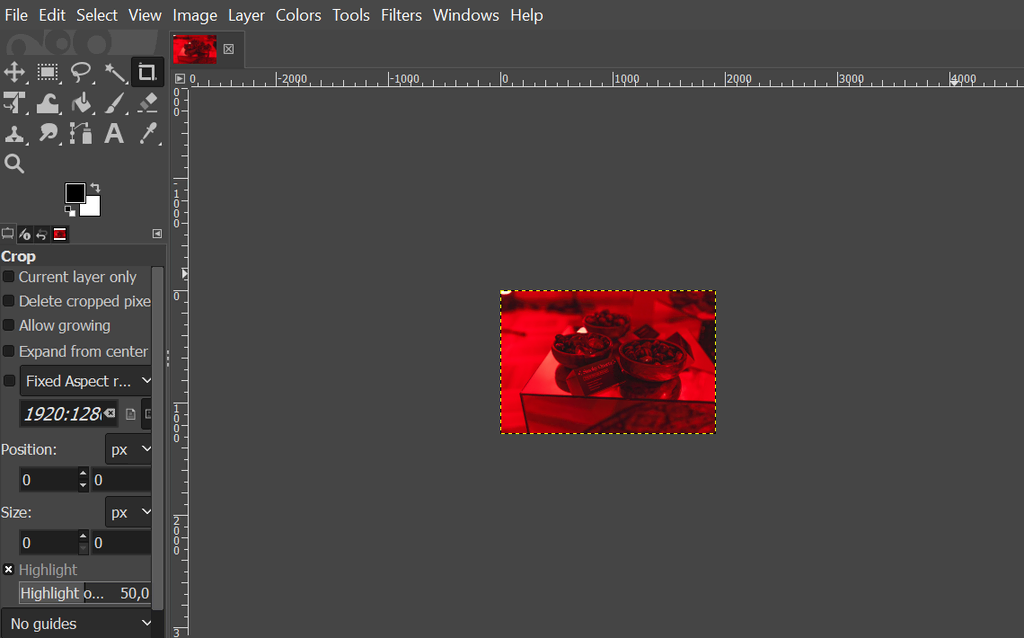
- Wait until the process is complete, and your image will resize on the editor like so:
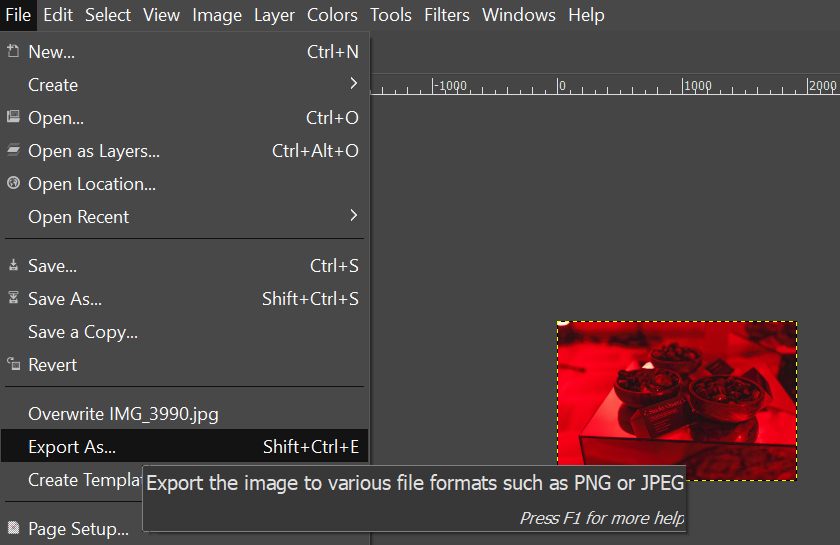
- Export the scaled image by going to File → Export as.
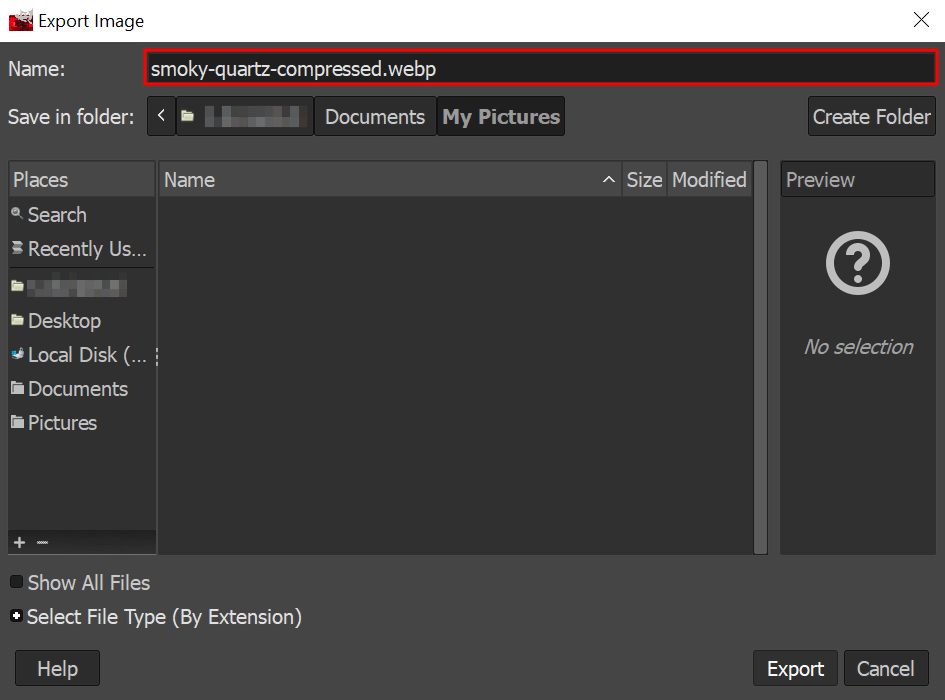
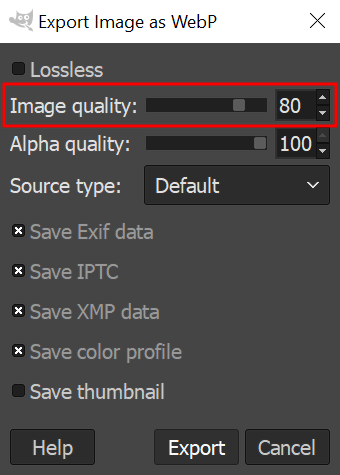
- Rename the image and type in your preferred format as you export. For example, here, we rename the image as smoky-quartz-compressed.webp.
- Adjust the compression level in the Image quality section, for example, 80. Click Export.
- Now, let’s check the result. Go to your local computer’s folder where you saved the before and after images. Then, compare the sizes.

2. Kraken.io
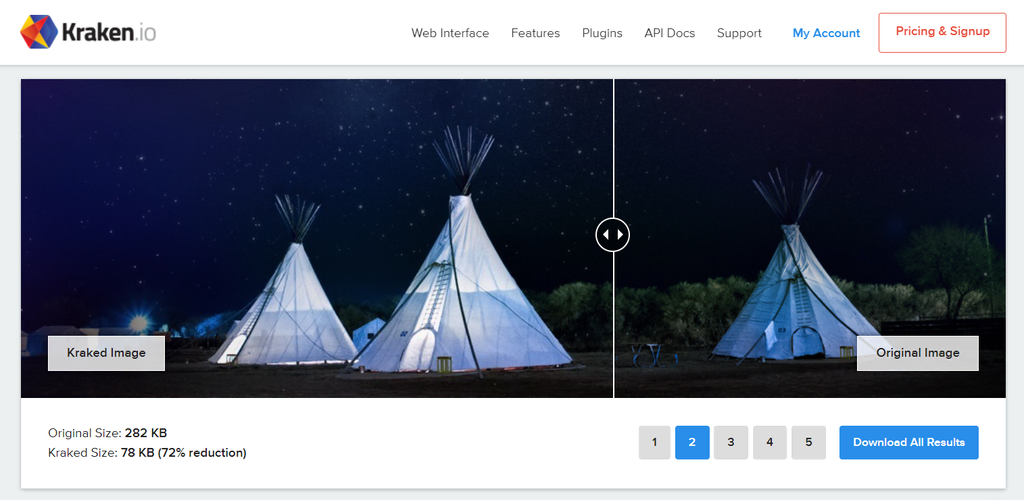
Kraken.io is a comprehensive image optimization platform that enables you to compress PNG, GIF, animated GIF, SVG, and JPEG images. It uses advanced algorithms to achieve the perfect balance between image quality and compression.
The platform offers a side-by-side comparison of the original and optimized images, ensuring the compression maintains acceptable image quality.
Kraken.io’s free compression tool has a file size limit of 1 MB. To compress images, select your preferred optimization mode – Lossy, Lossless, or Expert. Then, upload images or drag and drop them into the platform’s compression interface.
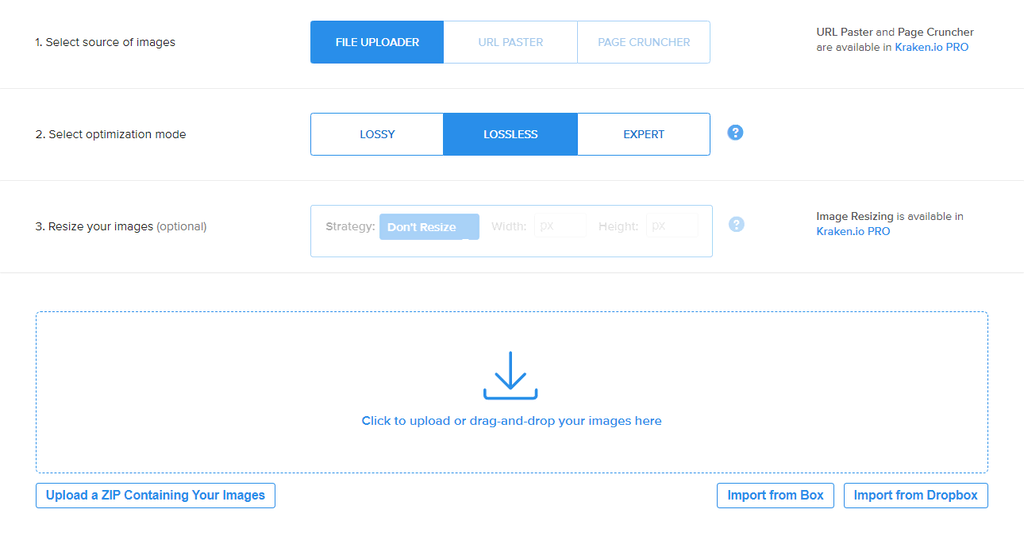
Upgrade to the premium version (starting from $5/month) to unlock more features like bulk compression and image resizing.
3. Imagify
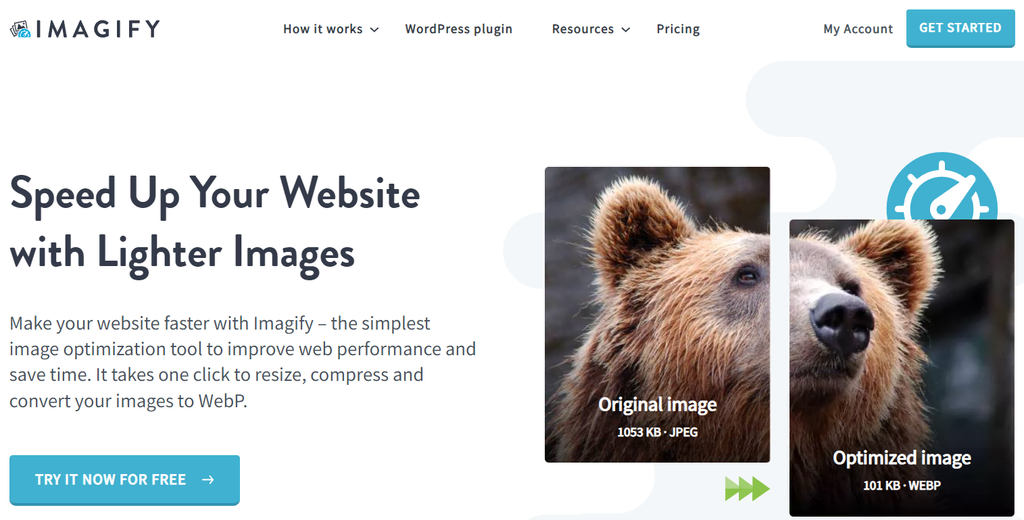
Imagify, supporting the WebP format, offers a range of compression options, including lossy, lossless, and ultra-compression modes.
The EXIF data preservation is a unique feature. It retains image metadata, such as the camera settings, the date and time of capture, and the location where the photograph was taken, after compression.
Raster images, like those in JPEG, TIFF, and some RAW file formats, can contain EXIF data. By preserving EXIF data, Imagify lets you access image metadata for post-processing, archival purposes, or analyzing photography techniques.
Imagify’s free plan allows you to compress up to 200 images per month but limits the file size to 2 MB. Purchase the premium plan (starting from $5.99/month) to unlock options for backing up your files, unlimited upload size, and the processing capacity for around 5,000 images, among other features.
4. Smush
Smush is one of the most widely used image optimization tools among WordPress site owners. Its standout feature is bulk compress, enabling you to optimize your images simultaneously.
After activating the plugin, you can see the bulk smush detection of your unoptimized images. Here’s how to proceed:
- Click the Bulk Smush button.
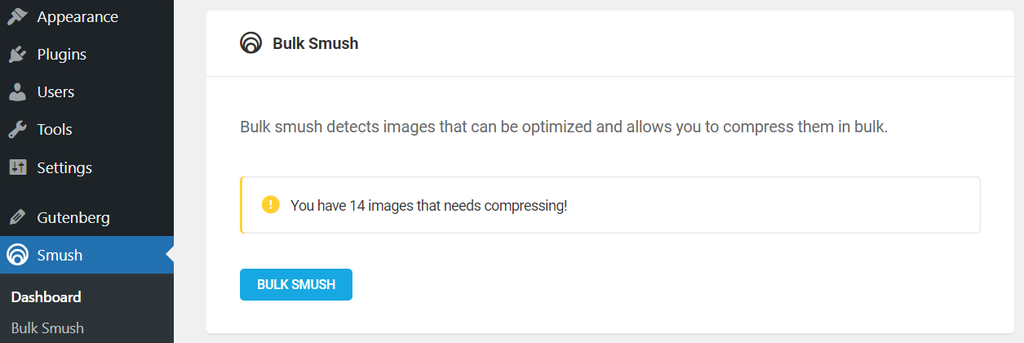
- Sometimes, the plugin might ask for a re-check. Hit the Re-check Images button to initiate the process, then click Resume Bulk Smush.

- Once bulk optimization is complete, you’ll get a report like this:
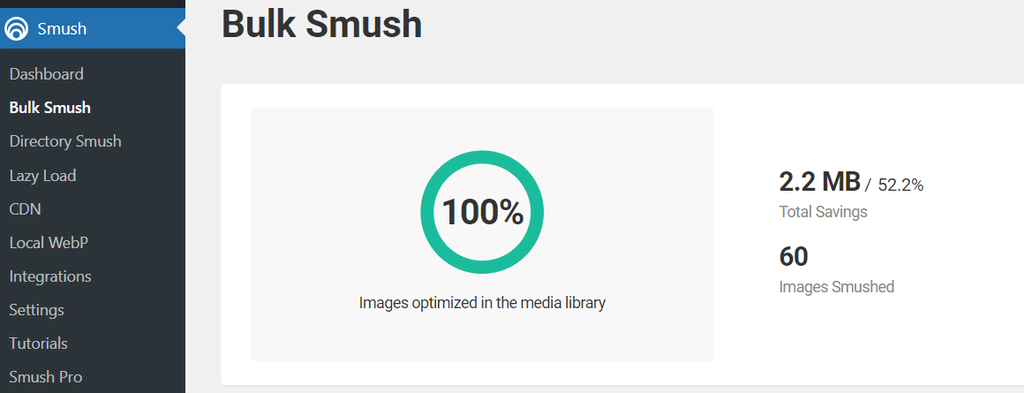
While Smush’s free version provides a solid range of features, the paid version offers more advanced options. The Smush Pro plans (starting from $3/month) include unlimited compression, WebP image conversion, and unlimited image file size uploads.
5. TinyPNG

TinyPNG offers smart lossy compression techniques to reduce JPEG and PNG files significantly. The smart aspect of its compression lies in its ability to selectively decrease the number of colors in the image.
With TinyPNG, you can upload, compress, or resize images through its website or via plugins for various content management systems. The WordPress plugin, for instance, can automate image optimization upon upload.

Despite its name, TinyPNG works in various formats, including WebP, JPEG/JPG, and PNG images. The tool also supports transparency in PNGs, which is particularly useful for web graphics.
While TinyPNG offers a free service, there are limitations on the file size and number of images you can compress at one time. The premium version (starting from $39/year) comes with higher credits, support for larger image sizes, and API access for automated workflows.
6. ImageRecycle
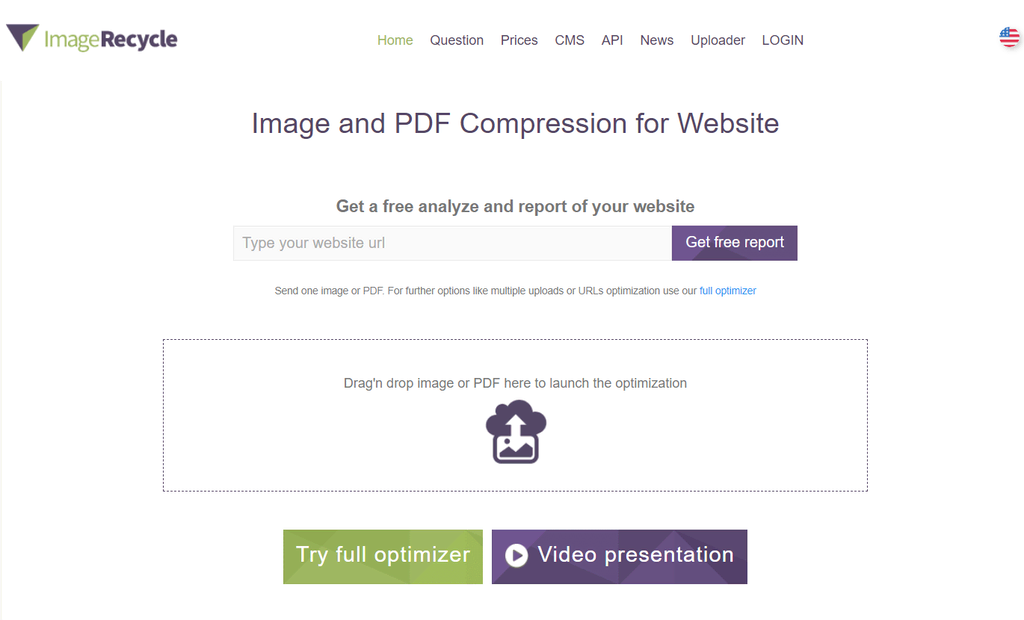
ImageRecycle supports a variety of image formats, including JPEG, PNG, GIF, and SVG, as well as PDF documents.
Utilize this tool to conduct a website scan and gain insights on unoptimized images. All you have to do is enter your website address and input your email address. The image optimizer will then send a free report to your email.

Conclusion
Image optimization plays a critical role in elevating your site performance. With site visitors expecting smooth online experiences and search engines prioritizing fast-loading websites, image optimization is an essential skill in your web maintenance checklist.
Here’s a recap of image optimization strategies covered in this article:
- Choose the appropriate format. Select JPEG for photos, PNG for images requiring transparency, GIF for animations, and WebP for a balance between image quality and size.
- Compress your images. Optimize images using lossy compression where perfect quality isn’t crucial and lossless compression for images where detail is paramount.
- Place your image strategically. Place images strategically to complement text effectively without causing distractions.
- Consider your image accessibility. Ensure all images have descriptive alt texts to aid visitors who rely on assistive technologies and improve SEO.
- Serve images via CDN. Use a content delivery network to deliver media files, including images, faster to users. It works by serving your images from servers closest to the user’s location.
- Use the correct image dimensions and aspect ratio. Tailor image width and height to ensure proper display on various devices.
- Implement image SEO. Take care of your image quality, alt text, file name, and structured data to optimize images for both standard and image searches.
- Utilize lazy loading. Set images to load only when they’re about to enter the viewport, reducing initial page load times.
- Test and monitor site performance. Pay attention to metrics like LCP score and Google Analytics data for improved user experiences.
Keep in mind that image optimization is not a one-time task. Continually monitoring and refining your site’s images will ensure that your website remains competitive, engaging, and aligned with the best practices for online performance.
Image Optimization FAQs
Let’s answer four frequently asked questions about image optimization.
Why Should You Optimize Images?
Optimizing images is crucial for enhancing website load times and improving user experience.
How Important Is Image Optimization in SEO?
Optimized images contribute to a quicker page load time, positively affecting your site’s ranking. Images with appropriate file names and alt texts can also rank higher in image search results, driving additional traffic to your site.
How Do I Optimize an Image Without Losing Quality?
To optimize an image without losing quality, use lossless optimization techniques with tools like GIMP, Kraken.io, or Imagify. You can also resize images to the exact dimensions needed on your web pages, as smaller images naturally have smaller file sizes.
What Is the Best Image Format for Optimization?
Photographs and complex images could use the JPEG format. For images requiring transparency or exact detail, PNG is preferred. WebP images are popular among website owners, as they have smaller file sizes than JPEG and PNG for comparable compression quality levels.

Linda is a seasoned Content Writer specialized in website creation. With her passion for the written world and obsession with helping others, her goal is to deliver resourceful content pieces for all skill levels. When she’s not writing, Linda likes to cross stitch and watch films. Follow her on LinkedIn.
Comments
August 30 2022
Thanks for the useful information! I take photos for my site myself, but I'm still not sure that I'm uploading the right images to the site that won't cause damage. Many write that the size of the compressed image should not be more than 100 kb. What do you think about this?
September 02 2022
Hey! Yes, compressed images should be up to 100 kb with the standard size of 2400x1600px ?