Making a Website With HTML in 8 Simple Steps + Post Development Suggestions
Building a website nowadays is simple and doesn’t require coding knowledge. Platforms like Hostinger website maker offer a simple visual interface and drag-and-drop features to ease the development process.
However, you may want to build websites from scratch with Hypertext Markup Language (HTML). While it is more difficult, HTML websites are more flexible and faster as they require fewer resources to run.
To help you get started, this article will explain the steps in making a website with HTML. We will also provide you with post-development practices to improve your HTML site’s appearance and functionality.
Download website launch checklist
How to Make a Website With HTML
This section will provide step-by-step instructions to code a site with HTML. Before proceeding, refer to our HTML cheat sheet if you are unfamiliar with the standard markup language. Feel free to check out our guide on the basics of building a site to get more familiar.
1. Pick an HTML Code Editor
A code editor is software used to write your website. While you can create an HTML page with a default text editor like Notepad, it lacks features that help simplify the development process, such as:
- Syntax highlighting – marks HTML tags in different colors based on their categories. This makes the code structure easier to read and understand.
- Auto-completion – automatically suggests HTML attributes, tags, and elements based on the previous value to speed up the coding process.
- Error detection – highlights syntax errors, allowing a web developer to quickly notice and fix them.
- Integration – some code editors integrate with plugins, Git, and FTP clients to make the deployment process more efficient.
- Live preview – instead of opening HTML files manually on browsers, you can install a plugin to get a live preview of the site.
Since there are many options, we have listed some of the best HTML code editors to help you find one that fits your needs:
- Notepad++ – a free, lightweight text editor with added features for coding and plugin support.
- Atom – an open-source HTML editor with a live website preview feature and extensive markup and scripting language compatibility.
- Visual Studio Code (VSCode) – a popular tool for web development with a comprehensive extension library to expand its functionalities.
2. Plan the Site Layout
Creating a layout plan allows you to better visualize your website’s look. You can also use it as a checklist to track what elements to include in your site.
In addition, a layout plan helps you determine your site’s usability and navigation, which affect user experience. Some elements to consider when planning include the sites’ header, footer, and navigation.
You can use pen and paper or web design software such as Figma to design a website layout. It doesn’t have to be detailed as long as it roughly represents the look and feel of your site.
3. Write the HTML Code
Once the tool and layout plan is ready, you can start writing your site’s code. The steps may vary depending on your code editor, but the general idea is similar.
In this tutorial, we will show you how to do it using VSCode:
- Create a new folder on your computer. It will be the directory for all of your site’s files.
- Open VSCode → File → Open Folder.
- Locate the new folder and click Select Folder.
- Select New File. Name the file index.html and press enter.
- Click Create File to confirm.
- Once prompted to the index.html editor tab, enter the following basic HTML document structure:
<!DOCTYPE html>
<html>
   <head>
      <title> </title>
   </head>
   <body>
   </body>
</html>
To help you understand the code, here’s an explanation of each tag:
- <!DOCTYPE html> – tells web browsers that the website is an HTML page.
- </html> – the HTML document opening tag indicating where the code starts.
- <head> – a tag containing the site’s metadata.
- <title> – defines the text shown on the browser tab when visiting the web page.
- <body> – contains all visible content on the web page.
Pro Tip
Learn the difference between making a website using WordPress vs HTML to know which technique suits you best.
4. Create Elements in the Layout
Add HTML code into the index.html file to create the elements of your planned layout. Depending on your website design, you will need different HTML semantic elements.
These elements will separate your site into multiple sections and become the containers for the content. Here are the tags we will use:
- <header> – container for introductory content or navigation.
- <main> – represents the primary content of a web page.
- <div> – defines a section in an HTML document.
- <footer> – contains the content displayed at the bottom of your website.
Put these elements within the <body></body> tags in your index.html file’s code. Ensure to close each element with a closing tag, or your code won’t work.
Here’s how the complete code looks:
<!DOCTYPE html>
<html>
   <head>
      <title>Personal Blog</title>
   </head>
   <body>
      <header>

      </header>
      <main>
         <div class=”row">
            <div class=”post-text-box”>

            </div>
            <div class=”profile”>

            </div>
         </div>
      </main>
      <footer>

      </footer>
    </body>
</html>
5. Add the HTML Content
After the layout is ready, start filling them with your site’s content, like text, images, hyperlinks, or videos. If the content is not ready, use dummy content as a placeholder and replace it later.
Here are some tags we will use to add the website content:
- <h1> and <p> – contain heading and paragraph text. Use <br> tag to create a line break if the text is too long.
- <nav> and <a> – specify the navigation bar and its anchor element. Use the href attribute to specify the anchor’s linked URL.
- <img> – container for the image element. It contains the img src attribute, specifying the link or name of the image file.
Pro Tip
The img tag also has an optional alt attribute. It describes the image in case the file doesn’t load.
Here’s what the code looks like:
<!DOCTYPE html>
<html>
   <head>
      <title>Personal Blog</title>
      </head>
   <body>
      <header>
      <h1>Your Personal Blog</h1>
      <nav>
         <a href=”domain.tld/home”>Home</a>
         <a href=”domain.tld/blog”>Blog</a>
         <a href=”domain.tld/about”>About</a>
      </nav>
      </header>
      <main>
         <div class=”row">
            <div class=”post-text-box”>
               <h1>Newest Post</h1>
               <section>
                  <h1>First Post</h1>
                  <p>The first post’s content</p>
               </section>
            </div>
            <div class=”profile”>
               <h1>About Me</h1>
               <img src=”profile-picture.png”>
               <p>About the author</p>
            </div>
         </div>
      </main>
      <footer>
         <a href=”twitter.com/author”>Twitter</a>
         <a href=”facebook.com/author”>Facebook</a>
         <a href=”instagram.com/author”>Instagram</a>
      </footer>
    </body>
</html>
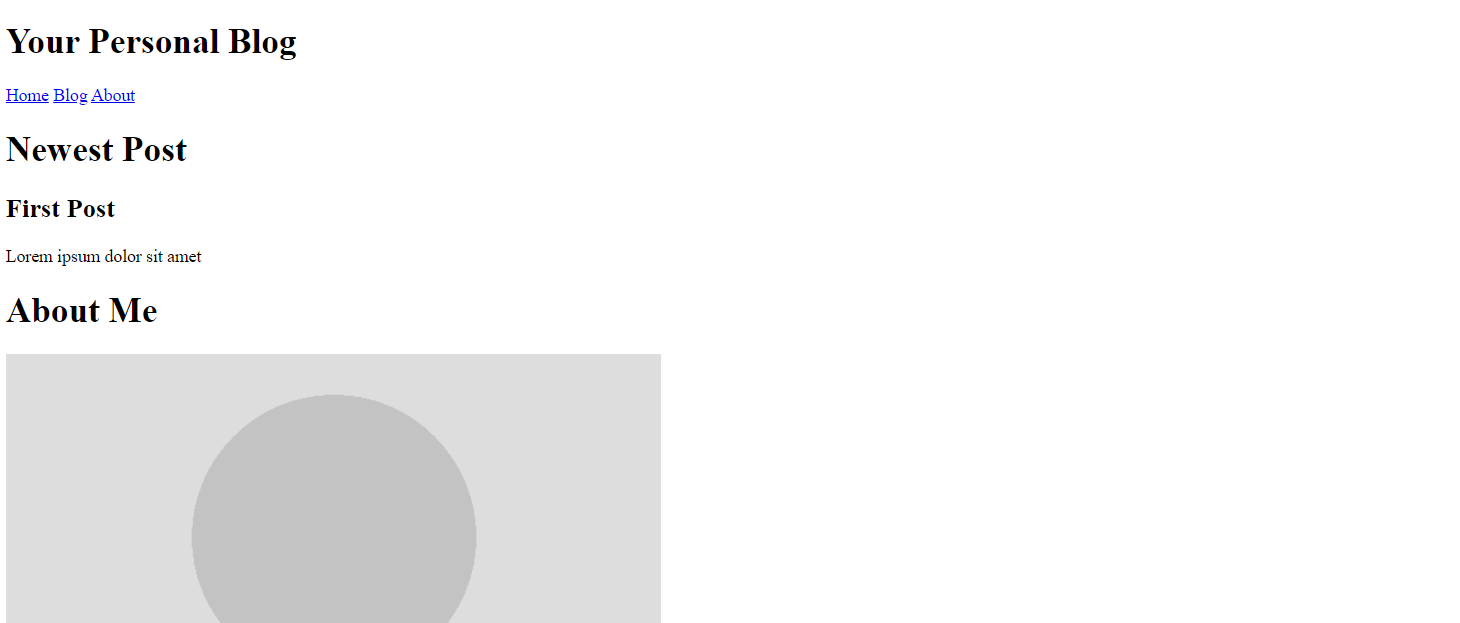
After adding the code, your HTML website will have an appearance. Here’s how it looks:
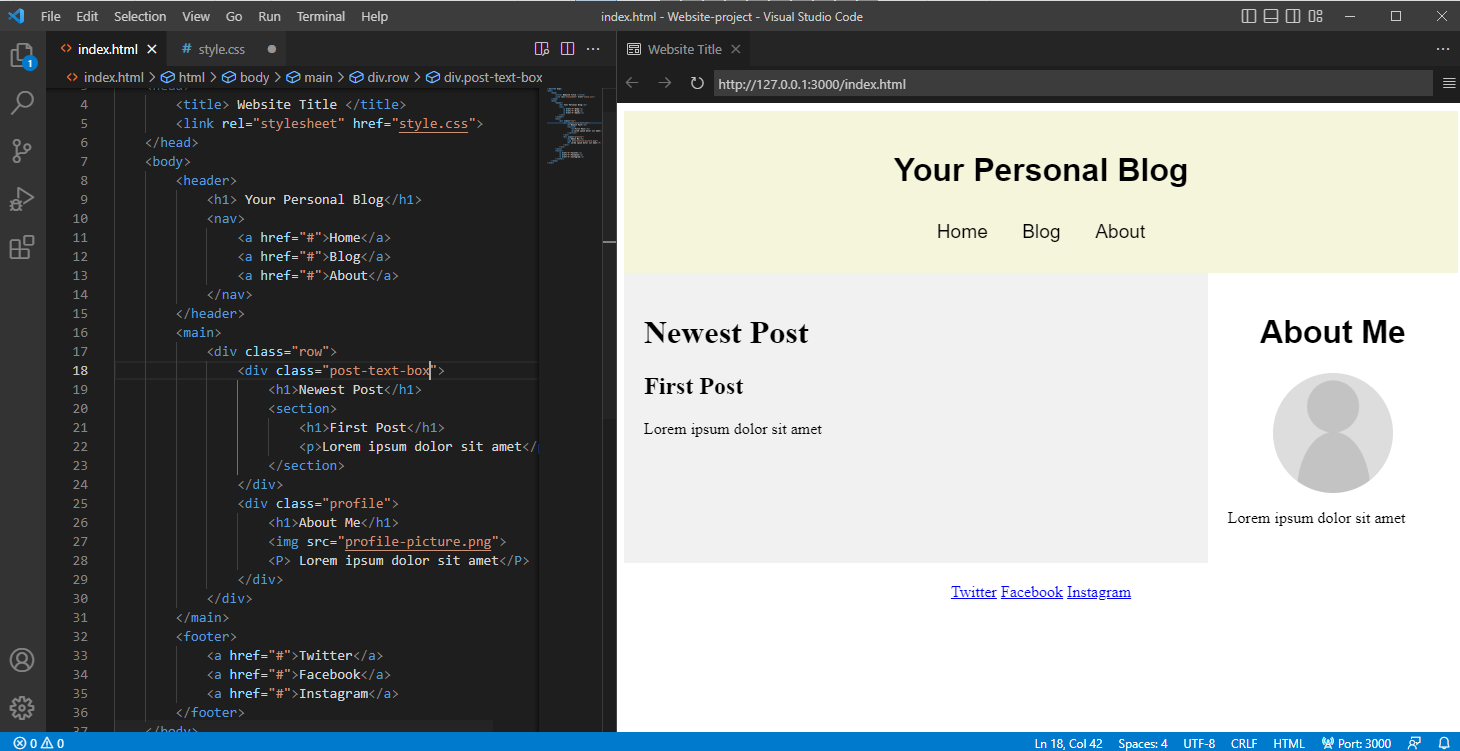
6. Include Layout CSS
Since HTML only lets you create the website’s structure and add basic content, use Cascading Style Sheets (CSS) to change its layout. CSS is a language that defines the style of your HTML document.
To do this, create a style.css file and link the stylesheet to the HTML document by adding the following code between the <head> opening and closing tags of index.html:
<link rel="stylesheet" href="style.css">
To make the two-column website layout, we will use the flex property. It arranges HTML elements using flexible containers, allowing them to adjust according to users’ screen size.
Here is what the complete code looks like:
/*header style*/
header {
   text-align: center;
   padding: 20px;
}
/*navigation menu style*/
nav {
   text-align: center;
   word-spacing: 30px;
   Padding: 10px;
}
/*creating the two-column layout*/
*{
   box-sizing: border-box;
}
.row {
   display: flex;
   flex-wrap: wrap;
}
.post-text-box {
   flex: 70%;
   padding: 20px;
}
.profile {
   flex: 70%;
   padding: 20px;
}
/*profile image and heading style*/
.profile img {
   width: 120px;
   display: block;
   margin-left: 0;
   margin-right: 0;
}
.profile h1 {
   text-align: center;
}
After you add the code snippet to your CSS file, here’s how the website will look:

Suggested Reading
Learn the different types of CSS, including inline, external, and internal.
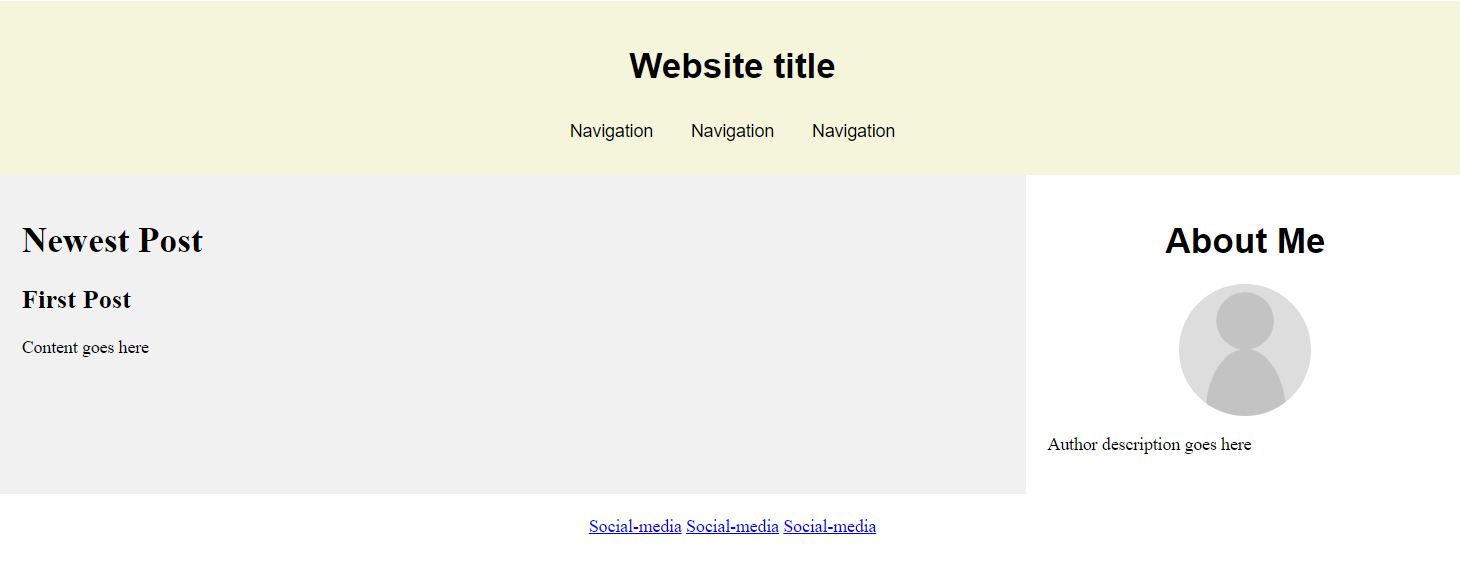
7. Customize Your Site
In addition to changing the layout, use CSS to customize other visual aspects of your website. For example, you can change the font family and background image.
To change your website’s appearance, add the CSS properties in the element you want to customize. For instance, here is the code to style the background color and text elements of the navigation menu bar:
/*navigation bar style*/
nav {
   text-align: center;
   word-spacing: 30px;
   padding: 10px;
   background-color: #f5f5dc
   font-family: Helvetica;

}
/*navigation bar button style*/
nav a {
   color: #000000;
   text-decoration: none;
   font-size: larger;
}
After adding CSS styling for every element, here is how the website looks:

8. Choose a Hosting Platform and Publish
Once you have all the website files and assets ready, it’s time to publish them. This step requires hosting, which you can obtain from a hosting provider. Check out our article for tips on finding the best web host.
Hostinger’s web hosting plans, starting at ₱89.00, include a free domain, SSL certificate, and automated backups. The lowest-tier plan offers 100 GB SSD storage to host up to 100 websites, providing ample space for future web development projects.
Standard security measures, such as a web application firewall, malware scanner, Cloudflare DNS firewall, and WHOIS Privacy Protection, safeguard your HTML website from malicious attacks. Users running on Business Web Hosting and above plans can also leverage our in-house DNS solution for enhanced performance.
Check out our hosting plan guide to find the perfect fit for your website. You can try our hosting services risk-free with our 30-day money-back guarantee.

After obtaining hosting, use either a file manager or an FTP client to upload your website to the internet.
Here’s how to upload your website files with Hostinger’s File Manager:
- Navigate to Files → File Manager from hPanel.
- Open public_html and upload the website archive file from your computer to the root directory.
- Right-click the uploaded file and select Extract.
The file manager method is ideal for uploading website files under 100GB. Refer to our article on how to upload a website for assistance with either method.
Tips on Optimizing an HTML Website
This section will explain the steps to take after creating a website using HTML and CSS. Follow them to enhance your site’s accessibility and functionality.
Add a Dropdown Bar for Better Navigation
Complex websites with multiple pages have many navigation buttons, links, and texts. You can create a simple dropdown menu using CSS to group these elements.
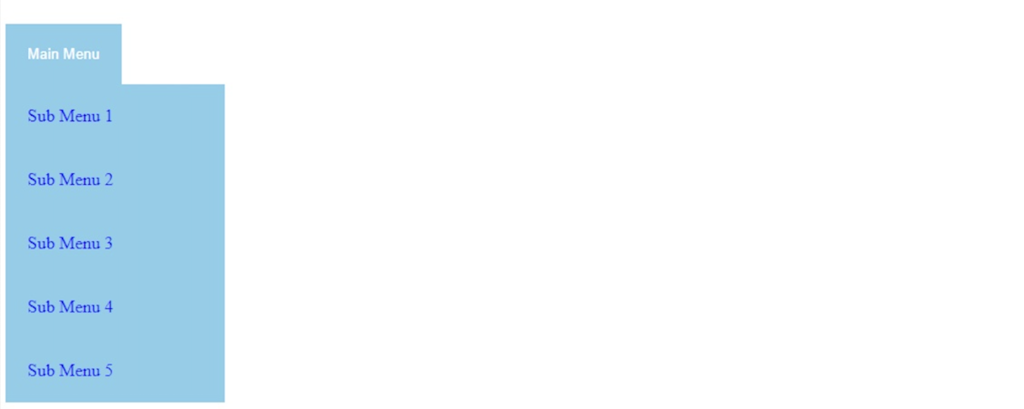
Users can expand the navigation bar to access the elements. It helps reduce clutter and improves the website’s usability for users with smaller screens.
Improve the Site Design With Advanced CSS
CSS lets you do advanced customization to enhance your site’s design for a better user experience. For example, enable scroll snapping, text animation, zoom on hover animation, and gradients.
In addition, you can build a responsive website with media queries, CSS rules, and flexboxes. The flexbox layout automatically adapts your site to the client’s screen size.
Make the Site More Interactive With JavaScript
JavaScript is a scripting language that lets you create interactive and dynamic website content. For example, enable animation, add countdowns, and include buttons, forms, or menus.
These features make your website more interesting and immersive, improving user experience. The steps to add JavaScript to your HTML website are similar to those for CSS. You can use a separate file or write it directly into the current code.
Do I Need to Learn HTML to Build a Website?
Users may not have the time or commitment to learn HTML for web development. Fortunately, some platforms let them create a functional website without writing code.
A website builder like Hostinger is an excellent option for beginners. It has a visual user interface and drag-and-drop editor, which makes customization easy.
Suggested Reading
To help you decide which method suits you better, read our tutorial to learn more about the benefits and downsides of using a website builder vs coding.
Maintaining a builder-based website is also simpler and less prone to error as you don’t need to manually update its source code. Simply select the elements you want to edit and apply the changes directly on one screen.
Since Hostinger Website Builder is included in all our hosting plans, you don’t need to purchase the service separately. It starts from $2.99/month and is upgradeable to higher-performance hosting services.

Conclusion
Instead of using website builders, you can code a website from scratch with HTML. Although more complicated to build, HTML websites are more resource-efficient and flexible as you can edit the source code.
In this article, we have explained how to code a website using HTML and CSS in eight steps:
- Pick an HTML editor – choose the program for writing and editing your website’s code, like VSCode.
- Plan the site layout – make a mockup of the website’s layout using a program like Adobe XD or a pen and paper.
- Write the HTML code – create an index.html file and add HTML document structure tags.
- Create the layout elements – separate your website into multiple sections based on the layout by adding tags to the HTML file.
- Add the HTML content – add the heading title, body text, and images into each section.
- Include layout CSS – create a style.css file and add CSS code to change the column position, text alignment, and elements padding.
- Customize your site – use CSS style attributes to customize the website’s background color, font size, typefaces, and other visual elements.
- Choose a hosting platform and publish – select a reliable and secure web host that provides the best value for money.
After creating your HTML web page, you can add advanced CSS and JavaScript to improve navigation, interactivity, and overall design. If you’re curious about the duration of this process, you might want to check out the time needed to create a website.
Too much to learn? Looking for a no-code builder? Check out Hostinger Website Builder:
Making a Website With HTML FAQ
To help you understand more about building a website with HTML, we will answer some commonly asked questions about it.
Is HTML Enough to Create a Website?
Yes, you can create a functional website with only HTML. However, it only displays static content such as text, links, images, and videos.
Use CSS to style the HTML element, like changing the background color and font size. To create a dynamic and interactive website, you also need PHP.
Is HTML Good for Creating Websites?
Yes, it is good for creating a static website. HTML websites require fewer resources to load and are flexible as you can modify the source code.
However, HTML is only suitable for complex websites if paired with CSS and JavaScript. If you’re only learning HTML, it’s better to use WordPress.
How Long Does It Take to Code an HTML Website?
More complex websites will take longer to build. The number of web developers working on the project, their skills, and resources can also affect the building time. Generally, an experienced developer can code a simple website from scratch in four to six weeks.

Aris is a Content Writer specializing in Linux and WordPress development. He has a passion for networking, front-end web development, and server administration. By combining his IT and writing experience, Aris creates content that helps people easily understand complex technical topics to start their online journey. Follow him on LinkedIn.
