How to Use the Facebook Debugger to Fix Your WordPress Images and Links
Sharing your content on Facebook is still one of the best ways to maximize your potential audience. However, in some cases, Facebook won’t display the right images for your articles. The good news is that you can address this issue rather quickly if you know how to use the Facebook Debugger tool.
All it takes are two steps:
- Clear your WordPress cache.
- Force Facebook to reload your open graph tags.
In this article, we’re going to talk about what the Facebook Debugger is and how it works. We’ll also explain why Facebook sometimes makes mistakes when pulling images from your content, and teach you how to fix the problem. Let’s get to work!

How Your WordPress Images and Links Are Displayed on Facebook (And What Can Go Wrong)
When you share your content on Facebook, the platform tries to pull a specific set of information that tells it what to display. To do this, it uses elements called ‘open graph meta tags’, also known as ‘og tags’.
Open Graph and its tags were developed by Facebook in 2010, to help content creators control the way the platform displays links to their pages.
In practice, these tags enable you to choose which title, description, and image should show up when you share a link from WordPress on Facebook:

Since the introduction of og tags, other social media platforms have also jumped on the bandwagon, including Twitter, LinkedIn, and Google+. That level of adoption should clue you in to the importance of these tags.
If social media platforms can’t pull the information they need from your content, however, things can get a little weird. For example, you might occasionally see Facebook display the wrong featured image when you share a post from your WordPress website.
This error – along with being annoying – can negatively impact your content’s click-through rates. Social media can be a massive source of traffic, so you want to ensure that your content appears just right when you share it on Facebook or other platforms.
Fortunately, using og tags properly is pretty simple. All you have to do is include them in your page’s HTML. Here’s what they should look like:
<!-- Open Graph data -->
<meta property="og:locale" content="en_US" />
<meta property="og:type" content="article" />
<meta property="og:title" content="How to Disable Comments on WordPress" />
<meta property="og:description" content="Learn two easy ways to disable comments on WordPress by following this tutorial. The guide covers how to do it using inbuilt WordPress dashboard tools or via plugins. You'll also learn to disable or remove WordPress comments on individual posts, pages, and other neat tricks!" />
<meta property="og:url" content="/tutorials/wordpress/how-to-disable-wordpress-comments" />
<meta property="og:site_name" content="Hostinger Tutorials" />
<meta property="article:tag" content="disable comments wordpress" />
<meta property="article:section" content="WordPress Tutorial" />
<meta property="article:published_time" content="2018-04-18T15:49:30+00:00" />
<meta property="article:modified_time" content="2018-04-25T12:28:53+00:00" />
<meta property="og:updated_time" content="2018-04-25T12:28:53+00:00" />
<meta property="og:image" content="/tutorials/wp-content/uploads/sites/2/2018/04/wordpress-disable-comments.png" />
<meta property="og:image:secure_url" content="/tutorials/wp-content/uploads/sites/2/2018/04/wordpress-disable-comments.png" />
<meta property="og:image:width" content="900" />
<meta property="og:image:height" content="560" />
Most of those tags are self-explanatory. All you have to do is set your own title, URL, meta description, and associated image where indicated.
Using og tags, you can control every aspect of how your content looks on Facebook. That means you can even A/B test variants to see which ones perform better, and use that information to optimize your click-through rates. Of course, that only works if the platform displays your content correctly. If your Facebook images are not showing up properly, you’ll need to do some troubleshooting. That’s where the Facebook Debugger tool comes in.
An Introduction to the Facebook Debugger Tool
The Facebook Open Graph Debugger helps you analyze your pages to see if there are any errors in the way they handle og tags. You can also use it to preview how your links will appear on Facebook when you share them, as in this example.
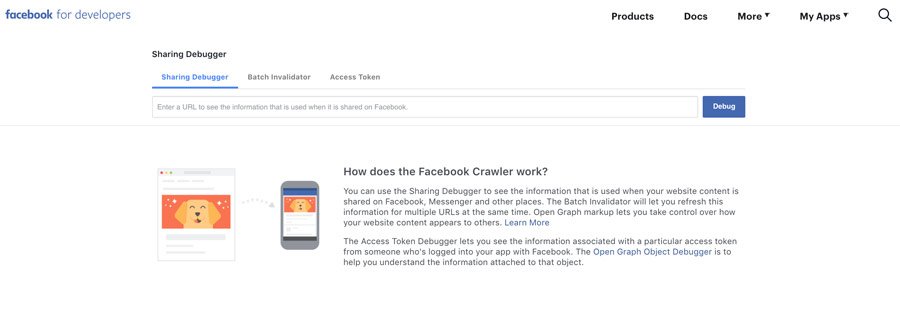
You don’t even need to sign up for a special account to use the Facebook Debugger. However, you do need to have a Facebook account to use it.
All you have to do is visit the website, and type in the link for the page you want to analyze. Then hit the Debug button, and the Facebook debug tool will return a full analysis.
The first thing you’ll see is a notification if the service finds an og tag missing:

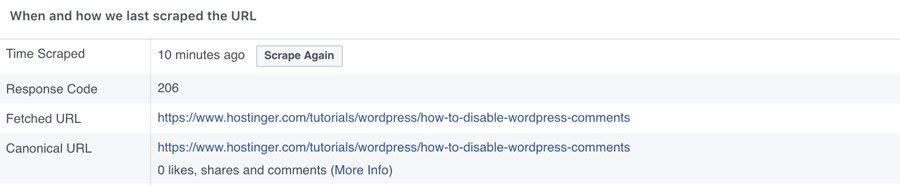
Below that, you’ll find information about the last time Facebook accessed or ‘scraped’ the link you entered. This section also includes information on the page’s canonical URL, and any redirects Facebook encountered:
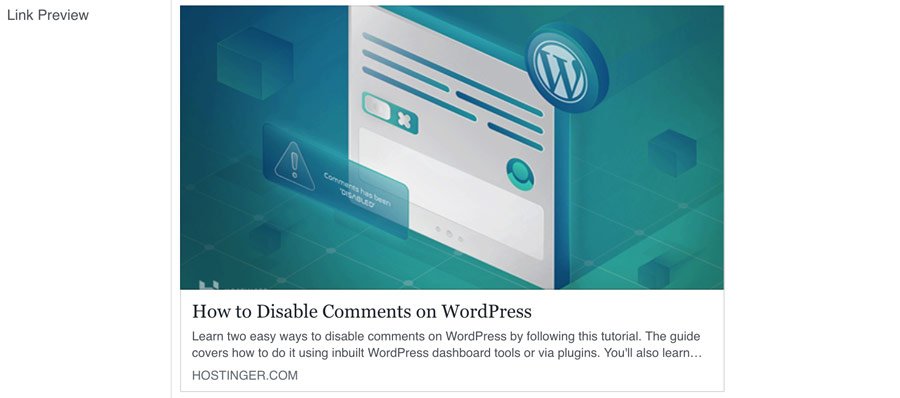
More importantly, you’ll also see a full preview of how Facebook will interpret the URL once you share it on the platform. If there are any errors with your featured image, for example, you’ll see them here:
If you want to be extra careful, you can test all your content using the Facebook URL debugger before you share it. However, that’s an inefficient approach. Instead, you should look to optimize your content’s og tags to avoid errors in the first place.
Before we talk about how to make that happen, scroll further down your report to see a full breakdown of all the og tags on the page you chose to analyze:
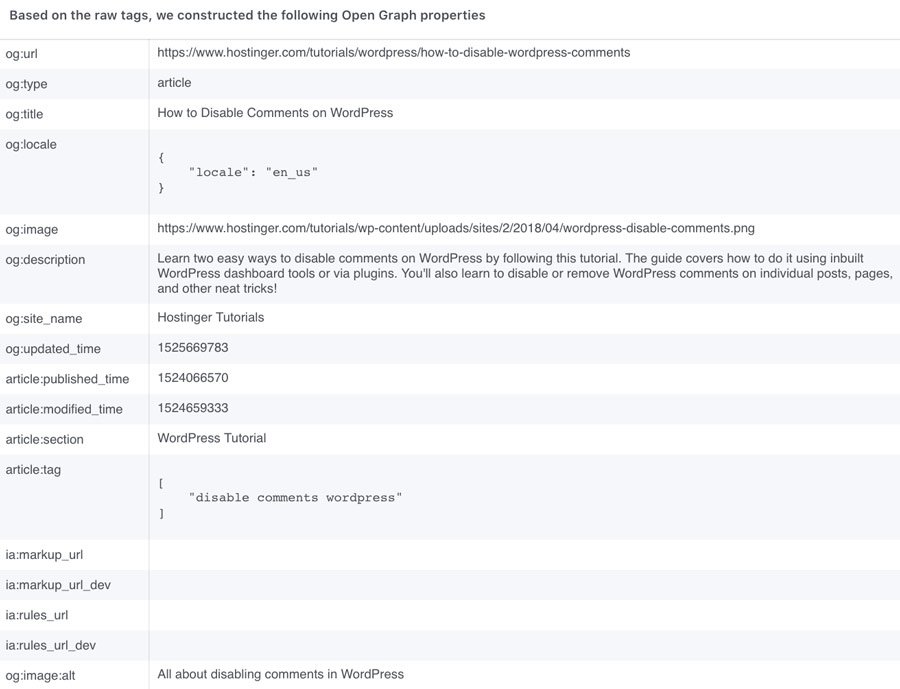
Ideally, what you see here should be the same title, meta description, URL, and images you set in WordPress. If those are not the values that appear here, you might want to use a dedicated tool to make sure your tags are set up correctly. Let’s talk about how to do that.
How to Fix Incorrect Open Graph Tags in Facebook
If the Facebook link debugger isn’t showing the content it should for your WordPress pages, chances are you’re not using og tags properly. The best way to take care of this problem is to use a plugin that can help you set og tags for each page manually.
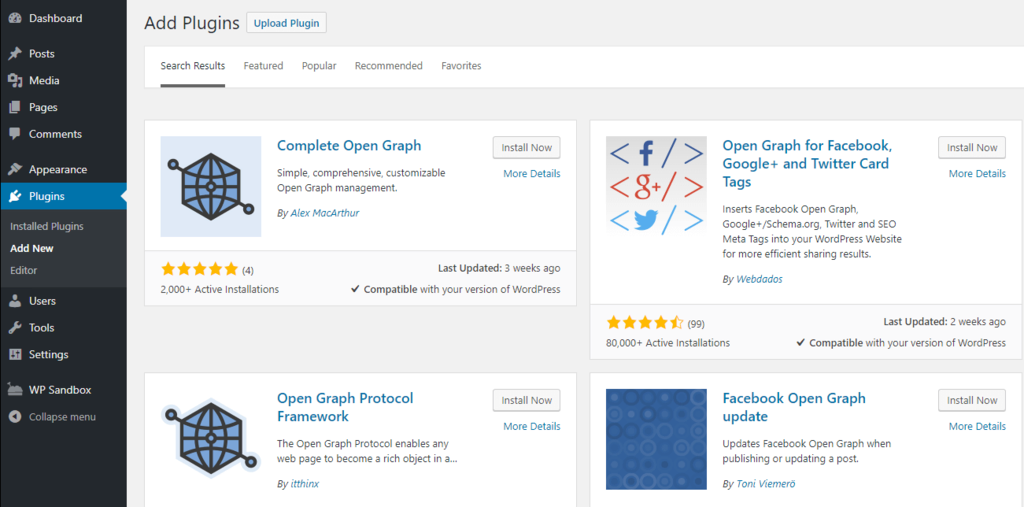
There are several plugins that enable you to choose what elements Facebook should display, which is the same as enabling you to configure your og tags. The easiest one to use is called Open Graph for Facebook, Google+, and Twitter Card Tags (we’ll just call it Open Graph for Facebook from now on, though!).

To use this plugin, go to your WordPress dashboard and navigate to the Plugins tab. Once you’re there, click on Add New, and use the search bar on the next page to look for the plugin using its full name. Open Graph for Facebook should appear first among the results, and all you have to do is click on the Install Now button next to its name:
After WordPress is done installing the plugin, a blue Activate button will show up next to its name. You’ll need to click on it before you can start using the plugin. When Open Graph for Facebook is active, a new widget will show up below the WordPress editor when you open up any page or post:
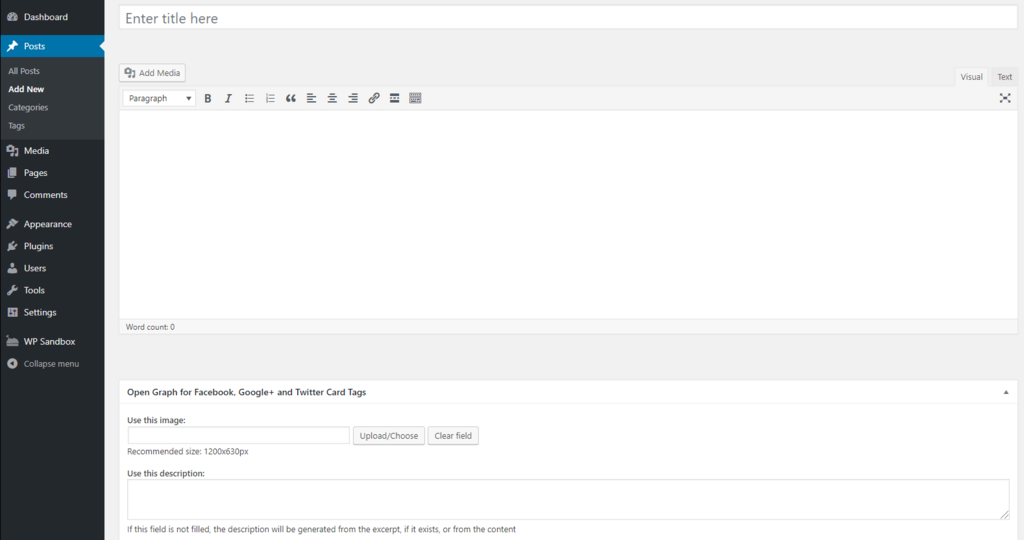
This section enables you to set your og image and description tags manually. As far as your content’s title and URL, the plugin will take care of those automatically.
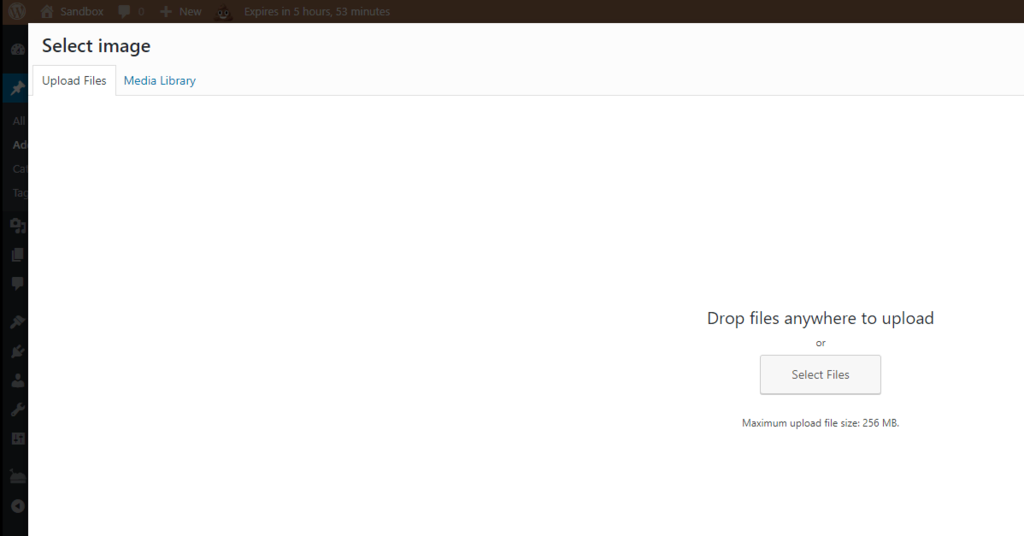
To set an image, click on the Upload/Choose button below the Use this image field. The plugin recommends that you use an image with a resolution of 1200 x 630 px, which is optimal for Facebook:
Keep in mind that even if you set an image manually through this widget, you’ll also need to choose a featured graphic using the Featured Image section. You’re free to use the same image for both, but you still need to tackle each task separately.
Once you’ve taken care of your Facebook image, go ahead and set a meta description for your content. You can write descriptions of up to 300 characters for Facebook, which is slightly less than Google’s limit of 320. Despite that small difference, we recommend that you use the same description in both places, just to make your life a bit easier.
When you’re done using the plugin, remember to publish or update your WordPress post or page. Now go ahead and share your content on Facebook. There should be no problems with your featured image now. If an error still occurs, take a look at the next section, where we’ll talk about how to tackle the most likely culprit.
How to Use the Facebook Debugger to Fix Your WordPress Images and Links (In 2 Steps)
If you’ve already configured your website’s og tags using the above process, chances are the problem doesn’t lie within your website’s structure. Instead, the most likely reason Facebook is not showing the right images for your content – or none at all – is probably your caching plugin. Let’s look at how to fix that problem now.
Step 1: Clear Your WordPress Cache
Caching plugins are incredibly popular, because they enable you to boost your website’s performance by storing some of its content in your visitors’ browsers. The problem is that sometimes Facebook might try to pull og tags from your cached content, instead of from the most up-to-date version.
For example, if a cached copy of one of your pages doesn’t include og tags, Facebook might have problems displaying the information correctly. Or you might have changed a page’s featured image, but Facebook is still insisting on showing an outdated version.
In any case, the most straightforward fix to this problem is to clean out your WordPress cache. There are many ways to do this, depending on which plugin you’re using. If you’re a fan of W3 Total Cache, for example, you just have to go to your dashboard and navigate to the Performance > Dashboard tab. You’ll see a button that reads empty all caches right at the top, which does exactly what you’d expect:
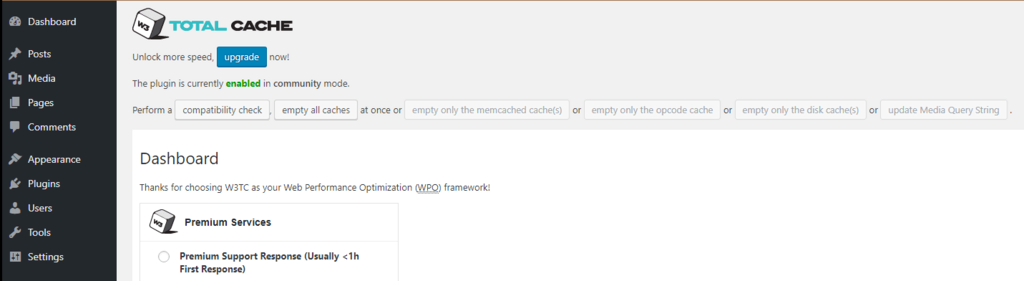
Click on that button now, and wait for the plugin to do its thing. After a few seconds, the page should reload, and your cache should be cleared.
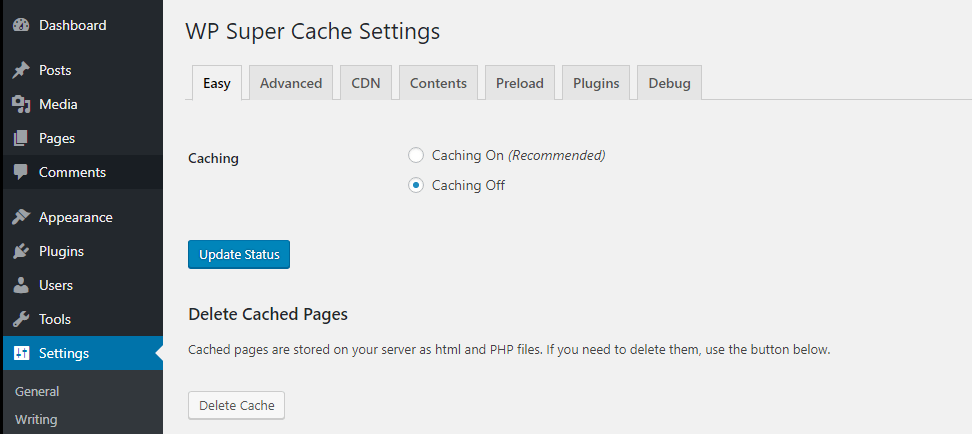
This process is just as simple for other caching plugins, such as WP Super Cache. If you’re using that tool, you just need to go to the Settings > WP Super Cache tab in your dashboard, and look for the Delete Cache button:
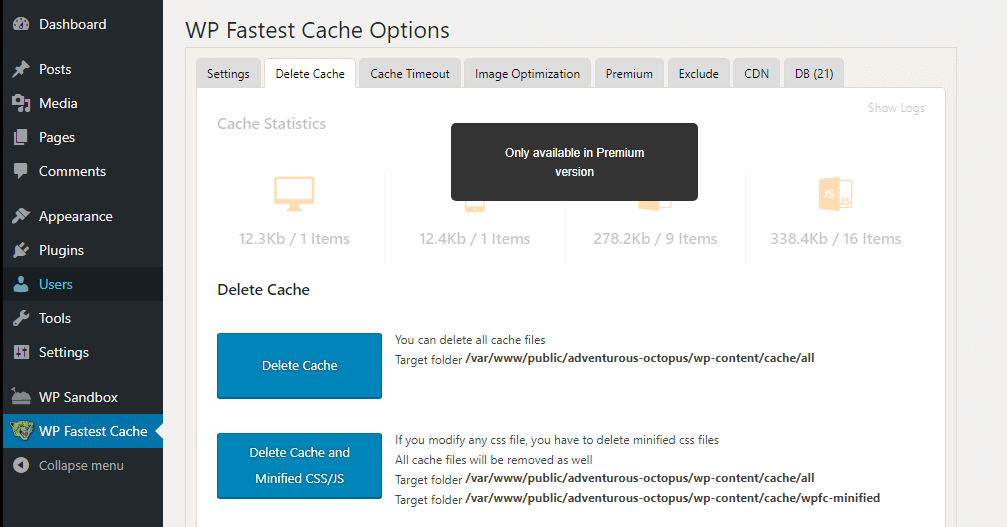
Another popular option is WP Fastest Cache. For that plugin, jump to the WP Fastest Cache tab and look for the section that says Delete Cache on the next screen. You’ll find a bright blue button that reads Delete Cache within:
Those are three of the most popular WordPress caching plugins. If you’re using a different tool, just take a quick look at its documentation. There should be instructions on how to clear your cache, and it’s likely to be a simple process.
Step 2: Force Facebook to Reload Your Open Graph Tags
This step is even simpler than the last. Since your cache is now clear, and you’ve set og tags for your content, Facebook should be able to structure your links correctly.
However, you still need to tell Facebook that it should check out your pages again and update its information. To do that, return to the Facebook Debugger tool and type in the URL you want to share on the platform:

On the next screen, you’ll find the same type of report we talked about earlier. Look for the button that says Scrape Again, right next to the Time Scraped field:

Click on this button now, and Facebook will take another look at your article. If everything’s working correctly (which it should be), your content’s preview should be pixel-perfect.
From this point onward, all you have to do is remember to set the images and meta descriptions you want to display on Facebook for each individual piece of content. If you run into any more issues, just clear your cache again!

Conclusion
When people see your content on Facebook, you want it to look just right. If Facebook is displaying the wrong featured images for your WordPress content, however, there are a couple of ways you can fix this problem.
Your first move should be to try using a plugin such as Open Graph for Facebook, Google+, and Twitter Card Tags. If that doesn’t work, you can always use the Facebook Debugger tool, and clear your cache.
Do you have any questions about how to fix errors using the Facebook Debugger? Let’s talk about them in the comments section below!
Learn More About WordPress
Complete WordPress Tutorial
How to Add Google Analytics to WordPress: A Beginner’s Guide
How to Set up a WordPress Intranet
How to Install Google Tag Manager in WordPress in 3 Easy Methods + Plugin Recommendations
How to Set Up Cloudflare CDN for WordPress Blog
Facebook Debugger FAQ
What Is a Debugger Tool?
Debuggers are software that help identify faulty code and errors in a piece of software or in an operating system.

Will Morris is a staff writer at WordCandy. When he's not writing about WordPress, he likes to gig his stand-up comedy routine on the local circuit.